Salsa-Stuffed Bell Peppers (Vegan)

This recipe comes from our intern, Delaney. She loves creating affordable, plant-based meals for herself and is excited to share her creations for you to enjoy!
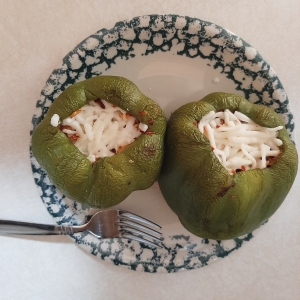
These stuffed peppers rely on tomato-based salsa to add a punch of flavor into this classic dish. Using your favorite salsa, you can make these peppers pack a spicy punch or a mild heat.

This dish uses lentils as a protein. Ground beef, or a vegan ground beef substitute, would also taste great as the protein in these peppers. For those using meat in this dish, add your cooked meat into the pan in place of lentils. I also use vegan mozzarella-style cheese to top these peppers, but regular cheese would work perfectly in this recipe.


Ingredients:

6 green bell peppers
2 cups cooked lentils
2 cups cooked brown rice
2 cups salsa
1 white onion
1 clove garlic
1 T salt (or as desired)
1 T black pepper (or as desired)
½ cup vegan mozzarella-style shredded cheese
4 T neutral oil

Instructions:

Preheat your oven to 400℉. Line a baking sheet with parchment paper and set aside.

Cut the tops off of your green peppers, removing the stem. Scoop out the seeds from the pepper and brush them with 3 T oil.

Dice your onion and mince your garlic.

On medium-high heat, add your onion into a pan. Drizzle with a T of oil and cook until tender.

Add your minced garlic or 2 T pre-minced garlic to the pan, allowing it to cook for 2 minutes and stir occasionally.

Add your salsa, salt and pepper to the pan, stirring until incorporated. Allow it to cook for 2 to 3 minutes.

Add your lentils and rice to the pan, stirring until incorporated. Allow it to cook for 3-5 minutes. Remove it from the stove.

Spoon the mixture into the peppers, filling them until there is ½ an inch of space in the top of the pepper.

Place the peppers in the oven for 20 minutes. After 20 minutes, remove the peppers and top them with shredded mozzarella-style vegan cheese.

Place the peppers back in the oven for 15 minutes. After 15 minutes, remove the peppers from the oven and allow them to cool for 3-5 minutes. Enjoy!

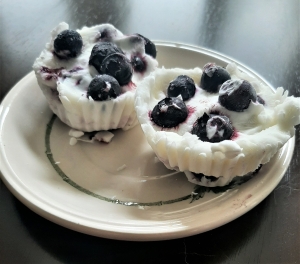
Frozen Fruit Cups

This frozen treat is a great snack or dessert to make with your kids on a hot summer’s day! With lots of fresh and fruity taste from the blueberries and a creamy punch from the Greek yogurt, these frozen yogurt cups are a surefire hit. It’s easy to whip up in an afternoon and your kids can even help you make it!

This recipe calls for blueberries, but you can use any fruit you’d like, or you can use multiple kinds of fruit. This recipe also calls for unsweetened Greek yogurt. You can use any kind of yogurt you have on hand, sweetened or unsweetened, although Greek is recommended to give it an extra-creamy texture. If the yogurt you’re using is sweetened, you may want to omit the honey or maple syrup to keep the sweetness balanced.

Ingredients:

1 cup unsweetened Greek yogurt
½ cup blueberries
1 T honey or maple syrup (optional)

Instructions:

Line a muffin tin with paper muffin liners.
In a small bowl, add your yogurt and honey. Stir to incorporate.
Add a few blueberries to the bottom of each muffin tin.
Spoon yogurt into each muffin tin, covering the blueberries. Fill the tins about ¾ of the way full.
Add the remaining blueberries to the top of each muffin tin.
Place the muffin tin in the freezer for 1 to 2 hours.
Remove the muffin tin from the freezer and release the yogurt cups from the tin.
Peel off the paper muffin liners and enjoy!


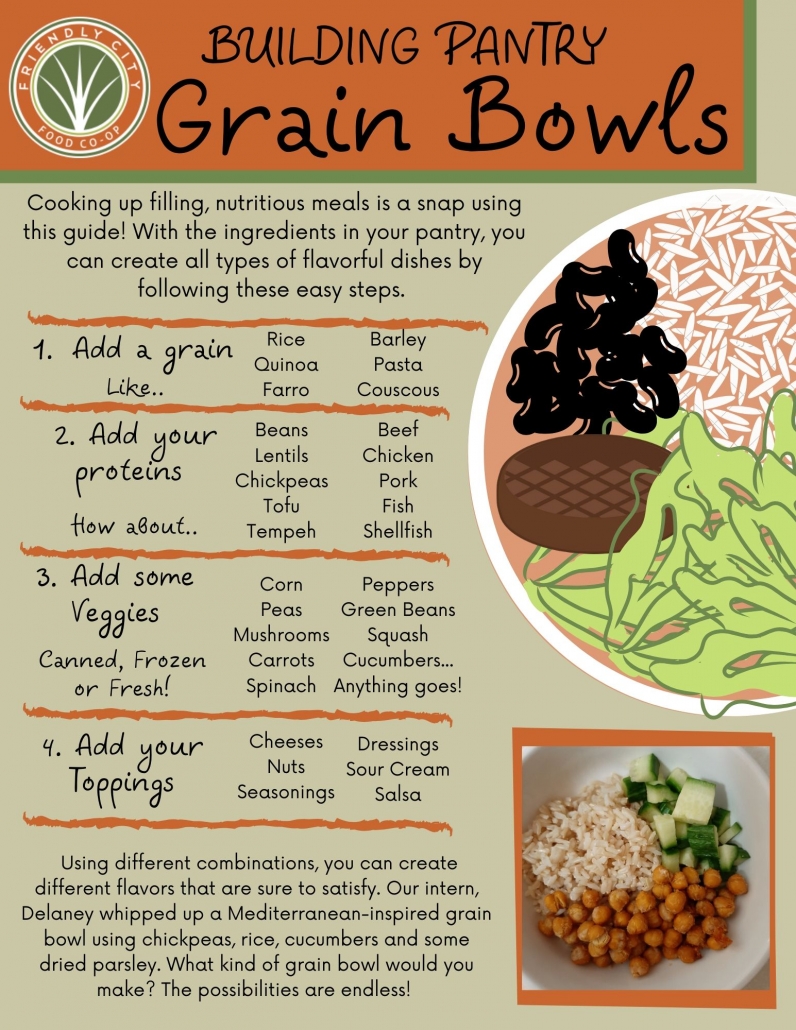
Building a Grain Bowl

Are you stuck thinking about what to make for dinner tonight?

Try whipping up an easy, delicious meal from your pantry by following this no-nonsense grain bowl guide.

Easy as 1, 2, 3… 4!


Crispy Oven-Roasted Chickpeas (Vegan)

This recipe comes from our intern, Delaney Blomstrom. She loves creating affordable, plant-based meals for herself and is excited to share her creations for you to enjoy!

Do you have a can of chickpeas, but aren’t sure what to make with them? These oven-roasted chickpeas are perfect for anyone in a pantry rut. Using ingredients I had in my spice cabinet, I whipped up these three delicious flavors. I hope you enjoy these flavors, and that this inspires you to make your own flavor combinations using this recipe.


Cuban-Inspired Chickpeas:
1 T cumin
1 tsp paprika
1 T onion powder
1 tsp salt (or to taste)
1 can of chickpeas (drained)
2 tsp oil of your choice (optional)


Cheesy Vegan Chickpeas:
2 T Nutritional Yeast
1 T garlic powder
1 tsp salt (or to taste)
1 can chickpeas (drained)
2 tsp oil of your choice (optional)


Tangy Ranch Chickpeas:
1 T dill
1 T parsley
1 T garlic powder
1 T onion powder
1 T apple cider vinegar
2 tsp oil of your choice (optional)


Directions:

  1. Preheat your oven to 400 ℉
  2. Line a baking sheet with parchment paper or a baking mat. Your chickpeas should not stick to the parchment paper, even if you don’t use oil for this recipe.
  3. In a medium sized bowl, add your drained chickpeas, all the seasonings and oil if desired. Stir the chickpeas until they are evenly coated in the seasonings and oil.  If the chickpeas still have moisture from their canning liquid, they will still crisp up in the oven. If they have had time to dry or if you’d like them to be very crispy, a little oil will be necessary to keep them from burning.
  4. Pour them onto the lined baking sheet, spreading them evenly across the sheet. 
  5. Roast for 40 to 55 minutes, turning the chickpeas over every 15 minutes to ensure an even roast on all sides.
  6. Remove chickpeas from the oven and cool for 5 to 10 minutes. Serve as a snack, side, salad topping or with your favorite grains!


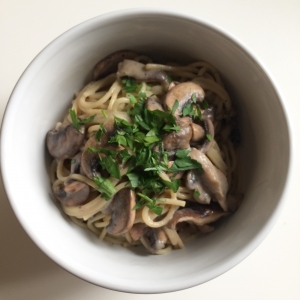
Creamy Mushroom Pasta (Vegan)

Makes 2 servings

This creamy mushroom pasta combines shiitake and white button mushrooms with a simple cream sauce to make one delicious dish. The Co-op carries a variety of fresh mushrooms and I was eager to create a recipe with them. Shiitake mushrooms have a smoky, earthy flavor, which pairs well with the mild flavor of the button mushrooms. I love cooking with mushrooms because they are versatile, hearty, and have a savory umami flavor. The cream sauce for this pasta is so simple to make and is made out of vegan butter, whole wheat flour, and soymilk. The silky sauce pairs perfectly with the savory mushrooms and tender pasta. If you’re looking for a new way to enjoy mushrooms, I recommend giving this recipe a try!


Ingredients:

2 ½ tbsp. vegan butter (I used Earth Balance Original)
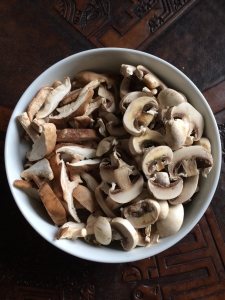
12 oz. button mushrooms, sliced
4 oz. shitake mushrooms, sliced
1 tsp. dried oregano
1 tsp. dried basil
1 ½ tbsp. whole wheat flour
2 cups unsweetened soymilk
Salt and Pepper to taste
8 oz. dried spaghetti
¼ cup Italian parsley, chopped


Directions:

  1. In a large pan, sauté sliced mushrooms in 1 tbsp. of butter over medium-high heat for 5 minutes until mushrooms become golden brown
  2. Season the mushrooms with dried oregano, dried basil, salt, and pepper. Transfer sautéed mushrooms to a bowl.
  3. To the same pan, melt 1½ tbsp. butter over medium heat. Once the butter is melted, add in whole wheat flour
  4. Whisk the flour and butter mixture for one minute. Add in soymilk and turn heat to high. Continue to whisk the cream sauce. Once boiled, reduce the heat to low and simmer for 15 minutes. Whisk occasionally.
  5. While the cream sauce is simmering, bring a large pot of water to boil. Once water is boiled, add in spaghetti. Cook spaghetti for 12 minutes until noodles are tender.
  6. Add the mushrooms to the cream sauce and mix. Next, add in the spaghetti and mix. Transfer the pasta to bowls and garnish with chopped parsley. Enjoy!


By Tiffany Wu / Guest Blogger

Tiffany is a graduate of JMU, and majored in dietetics. Her family owned a Chinese restaurant when she was growing up, so her passion for food and cooking began at an early age. She especially likes creating delicious and healthy plant-based recipes.


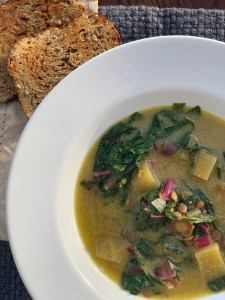
Golden Beet and Lentil Curry

Beautifully colored and even better tasting vegetables are the star of this delightful soup. This is the perfect dish to cozy up to on a cold evening. It is full of flavor and will fill up your home with the warm and savory aroma. Serve it over rice, with bread, or all alone, either way you will not be disappointed.

Ingredients

  • 32 oz vegetable broth
  • 5 oz can coconut milk
  • 1 yellow onion (diced)
  • 1 cup green lentils
  • 4 cups rainbow chard (chopped into 1 in. pieces)
  • 3 beets (approximately 1 cup, diced into ½ in. pieces)
  • 2 cups multi-colored carrots (approximately 7, diced into ½ in. pieces)
  • 2 tsp minced garlic
  • 2 ½ tsp green curry paste
  • 2 ½ tsp ginger
  • ½ tsp harissa puree
  • 2 tbsp balsamic vinegar
  • 1 tsp lemon juice
  • 3 tbsp sriracha
  • 3 tbsp fresh mint (cut in thin ribbons)
  • ½ cup olive oil
  • Salt and pepper to taste

Directions

  1. Heat olive oil on medium-high heat in a large stock pot.
  2. Add the onions, garlic, ginger, curry paste, salt, and pepper to the pot and sauté for 3 minutes until the onions are slightly translucent.
  3. Add the lentils, beets, and carrots to the pot and sauté for 3 minutes.
  4. To the pot, add the broth, coconut milk, harissa puree, salt, and pepper. Simmer on low heat for 25 minutes or until the vegetables are soft.
  5. Add the chard, vinegar, lemon juice, and sriracha. Cook for 2 minutes.
  6. Just before serving, top with fresh mint, season with salt and pepper then enjoy!


Guest Blogger: James Madison Dietetics
Emily Salvaggio

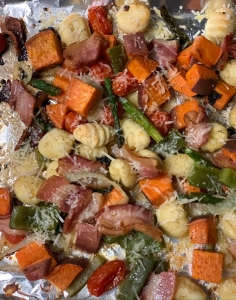
Easy Weeknight Gnocchi with Vegetables

This is a super easy recipe to whip up on a weeknight that looks and tastes as if it took you all day. It is healthy and satisfying and with one easy alteration can be made vegetarian if you so desire! So, relax, make use of leftover vegetables you have in your fridge, and cuddle up to this delicious and filling meal.

Ingredients

  • 12 oz package of frozen gnocchi (kept frozen until placed on sheet)
  • 1 medium sweet potato, cubed
  • 1-pint cherry tomatoes, whole
  • 1 ½ cup asparagus, chopped into 1-inch pieces
  • 1 green pepper, cubed
  • ½ yellow onion, slivered
  • 1 ½ cup bacon, chopped (can be withheld if vegetarian)
  • 5 oz package whole basil leaves, torn
  • 2 tsp garlic powder
  • ½ cup freshly grated parmesan cheese
  • 4 tbsp butter
  • Olive oil
  • Salt and pepper

Directions

  1. Preheat oven to 425°F
  2. Line a large baking sheet with foil
  3. Place the prepared vegetables and frozen gnocchi onto the baking sheet. (*Note: if the pan is overcrowded, feel free to spread it out onto more than one baking sheet as I did. * )
  4. Coat the vegetables with an even layer of olive oil, and add the garlic powder, salt, and pepper. Mix to coat evenly.
  5. Place the chopped bacon around the tray on top of the vegetables.
  6. Cut the four tablespoons of butter into ¼ inch cubes and spread it evenly on top of the sheet tray. (This is important. The butter is needed to ensure the gnocchi does not dry out.)
  7. Place the tray or trays into the oven for 25-30 minutes until vegetables are cooked and the bacon is crispy.
  8. Remove from the oven, top with parmesan cheese, and enjoy!

Guest Blogger: James Madison Dietetics
Emily Salvaggio


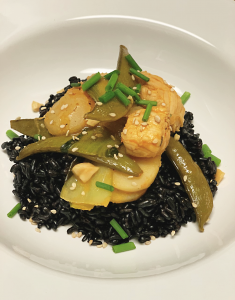
Honey-Sriracha Chicken

This is the perfect dish to make for weekday lunches or indulge in the evening for dinner. It is a well-rounded nutritious meal that is sure to satisfy. Perfect to make when craving your favorite take-out, but not wanting the guilt!


Ingredients

  • 2 cups cubed chicken (1 inch)
  • 1 cup forbidden rice (you can use whatever rice you prefer)
  • 1 ¾ cups vegetable broth
  • 1 ½ cups slivered yellow onion
  • 1 ½ cups snap peas
  • 2 cups chopped bok choy
  • 8 oz can water chestnuts
  • 2/3 cup sriracha
  • ¼ cup honey
  • 1 tsp toasted sesame oil
  • 1 tsp minced ginger
  • 1 tsp minced garlic
  • 2 tsp chopped fresh chives (reserve extra for garnish at the end)
  • Juice of ½ lime
  • Salt and pepper
  • Optional: in a dry pan, toast sesame seeds and chopped peanuts for added crunch

Directions

  1. In a small pot, add the rice, vegetable broth, salt and pepper. Turn the heat to medium high and bring to a boil. Once it has reached a boil, reduce the heat to simmer and allow to cook for 30 minutes until the liquid is absorbed and the rice is fluffy.
  2. In a large bowl, add the sriracha, honey, sesame oil, ginger, garlic, chives, and lime. Stir to combine and add the chopped chicken. Set aside.
  3. Coat a large skillet with olive oil. Add the onions, salt and pepper, and sauté on medium-high heat for 3-4 minutes.
  4. Add the snap peas and bok choy and sauté for 3 minutes.
  5. To the pan, add the chicken and all of the sauce. Cook until the chicken reaches an internal temperature of 165°F, approximately 10-14 minutes.
  6. Just before the chicken is done, add the water chestnuts to the pan.
  7. Once the chicken has reached its proper doneness, it is time to eat! Add a serving of the chicken and vegetables over the beautiful fluffy rice. Top with garnish and extra chives and enjoy!


Guest Blogger: James Madison Dietetics
Emily Salvaggio

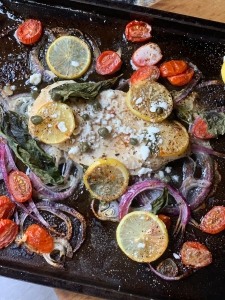
Mediterranean Sheet Pan Chicken

The new year brings new motivation and resolutions. Many of us may be opting to eat healthier this new year. If so, this is the recipe for you. The moist chicken paired with the beautifully roasted vegetables makes the perfect well-rounded dinner for you or the family. And it’s so delicious, it’s sure to please any eater.

Ingredients for the Chicken

  • 4 boneless skinless chicken breasts
  • Greek salad dressing/ marinade
  • 1 cup halved cherry tomatoes
  • 1 small (or ½ large) red onion, sliced in thin rounds
  • 2 lemons sliced
  • 16 basil leaves (4 on each breast)
  • 1 tsp garlic powder
  • Salt and pepper
  • Optional: top chicken with feta cheese and capers

Ingredients for the Glaze

  • ½ cup honey
  • 2 tsp chili garlic sauce
  • 1 ½ tbsp water

Directions

  1. Preheat oven to 375 °F
  2. Place the chicken in a large bowl or plastic bag with the marinade (or dressing). Add enough marinade to evenly coat the chicken. Marinate overnight or just while preparing other ingredients.
  3. On a large sheet pan, evenly spread the onions and tomatoes. Place the chicken on top, pouring any remaining marinade on the chicken and vegetables.
  4. Season heavily with salt, pepper, and garlic powder.
  5. Place the sliced lemons evenly over the top of each chicken breast along with four basil leaves.
  6. Place the chicken in the oven and cook for 25 minutes or until the chicken has reached an internal temperature of 165 °F.
  7. While the chicken cooks, place the honey, chili garlic sauce, and water in a small pan. Heat on medium until it is evenly combined and begins to boil.
  8. When the chicken is done, spoon the honey chili sauce over each breast. Top with feta cheese and capers if desired. Enjoy!


Guest Blogger: James Madison Dietetics
Emily Salvaggio

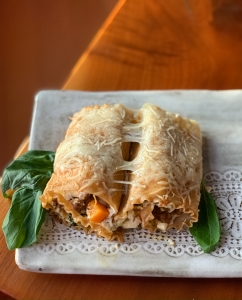
Butternut Squash Lasagna Roll-Ups

These little treats will make the perfect dinner on a cold winter night or add a spark to your next holiday party. Not only are they tasty and satisfying, but they are filled to the brim with nutritious ingredients. Try these today!

Ingredients

  • 1 package of whole wheat lasagna noodles
  • ½ cup diced yellow onion
  • 2 cups cubed butternut squash
  • ¼ tsp minced garlic
  • 16 oz mild Italian sausage (uncased)
  • 6 basil leaves chopped
  • ¼ tsp poultry seasoning
  • ¼ tsp thyme
  • ¼ tsp rosemary
  • 32 oz whole milk ricotta
  • 1 egg
  • 1 tsp garlic powder
  • ½ tsp onion powder
  • 1 tsp parsley
  • 1 ¼ cup shredded mozzarella cheese
  • 1 ¼ cup shredded parmesan cheese
  • Salt and pepper to taste

Directions

  1. Preheat oven to 375°F.
  2. Season a large pot of water with salt. Set on high to boil and cook the noodles to al dente. (Tips: Add olive oil to the water so the noodles don’t stick together. After cooking, rinse with cold water and drizzle with olive oil to further prevent sticking.)
  3. Coat a large pan with olive oil and add the onion. Cook on medium to high heat for five minutes until just translucent.
  4. Add the butternut squash, minced garlic, poultry seasoning, thyme, rosemary, salt and pepper, and cook for ten minutes.
  5. Add the sausage and basil and fully cook. Approximately 8-10 minutes.
  6. In a large bowl add the ricotta, garlic powder, onion powder, parsley, ¼ cup mozzarella cheese, ¼ cup parmesan cheese, egg, salt and pepper. Set aside
  7. Coat a 9 x 13 pan or larger with olive oil.
  8. Form the roll-ups. Spread an even amount of the ricotta mixture onto a noodle. Add an even layer of the butternut squash mixture on ¾ of the noodle. Starting at one end, begin loosely rolling the noodle until it is fully rolled. Place the rolled noodle in the oiled pan and repeat.
  9. Lightly drizzle olive oil over the top of the noodles.
  10. Sprinkle the remaining cup of mozzarella and parmesan cheese over the noodles.
  11. Bake for 20 minutes until the cheese is golden and bubbly. Enjoy!


Guest Blogger: James Madison Dietetics
Emily Salvaggio