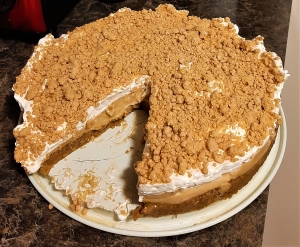
Posts

Bakewell Tart

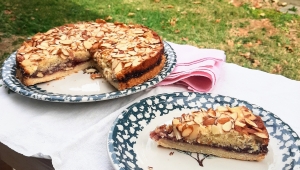
Have you been searching for a Thanksgiving-worthy dessert that strays away from the classics? Look no further than this recipe for the British staple, the Bakewell tart. This tart is filled with frangipane, which is a delightful almond confection, plus a layer of sweet-tart raspberry jam. Topped with sliced almonds and wrapped in a sweet pastry crust, it’s sure to keep your guests saving room for dessert this holiday season. 


Ingredients for the crust:

1 ½ cups all -purpose flour

¼ cup granulated sugar

8 T butter, cold

1 egg yolk (save the white for the filling)

2 T cold water (as needed)


Ingredients for the filling:

8 T butter, softened

½ cups granulated sugar

¼ tsp salt

1 cup almond flour

¼ cup all-purpose flour

1 egg white

1 egg (whole)

1 cup raspberry jam

1 T vanilla extract

1 cup sliced almonds


Instructions:

Line a 10-inch tart pan with a removable bottom using butter. Set aside. 

To make the tart crust, add your flour and sugar to a large mixing bowl. Whisk together to combine. 

Cut your cold butter into small cubes and add them to the bowl. Mix them together using your hands, or a fork if your hands are too warm. Work it into the flour until there are no lumps and the dough becomes a sandy mixture. 

Add your egg yolk and work it into the dough until incorporated. 

If your dough is not coming together after working in the egg yolk, add a tablespoon of cold water. Once most pieces of the dough are lumping together, it’s ready. 

Press the dough into your prepared tart pan in an even layer. Put it in the freezer and set a timer for 30 minutes. 

Preheat your oven to 400 F. 

Once your crust is done freezing, bake it for 15 minutes. 

When your crust has baked, remove it from the oven and spoon an even layer of your raspberry jam on top of it. 

Reduce your oven temperature to 350 F. 

Begin making the frangipane filling by adding your almond flour, sugar, salt and flour to a large mixing bowl. Whisk the ingredients together to combine. 

Cut your softened butter into chunks and add it to your mixing bowl. Mix the butter until well combined on low speed with a hand mixer. 

Add your egg white, whole egg, and vanilla extract. Mix on low speed until everything is incorporated and smooth. 

Spoon your frangipane onto your tart in an even layer. Be careful not to mess up your raspberry jam layer as you do so. 

Cover the top of the frangipane layer with your sliced almonds. 

Bake your tart for 35-40 minutes. You’ll know it’s ready when the edges are brown, the frangipane is golden, and a fork inserted in the center comes out clean. 

Allow it to cool and remove it from the tart pan. Serve and enjoy!

Lemon Posset

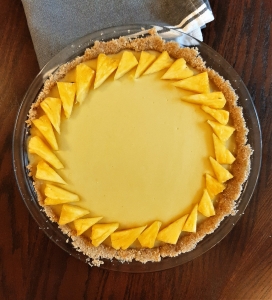
Nobody enjoys a hot kitchen during the peak of summer heat, but this recipe won’t have you making any sacrifices for a scrumptious treat. Similar to a pudding or custard, possets require little heat and some time in the refrigerator to become a creamy, tangy, refreshing dessert. Better yet, depending on the fruit you use, you can pour your posset into its own compostable container. 


Ingredients:

3 lemons (medium or large)

¾ cup heavy cream

1.3 cup granulated sugar

2 T lemon juice 

½ T lemon zest (or 1 T if you want stronger lemon flavor)

1 tsp vanilla extract


Instructions:

First, prepare your lemons. Cut them in half lengthwise and scoop out the flesh inside. Don’t throw them away, however, as you’ll use them later. 

Juice one of the lemons and set the juice aside.

Zest one of the lemons and set that aside also. 

In a saucepan, add your lemon zest, heavy cream and sugar. Bring it to a low summer for 3-4 minutes. Don’t allow it to boil.

Remove it from heat and add your lemon juice and vanilla extract. Stir well to combine

Run the posset through a fine mesh sieve to remove the lemon zest. 

Pour the posset into your hollowed-out lemons and allow it to set in the refrigerator for at least 4 hours, or overnight if possible. 

Garnish with cut fruit or extra lemon zest and enjoy!

Chocolate Covered Strawberries

May is the beginning of local strawberry season in the valley, and we receive carton upon carton of local strawberries. This dessert recipe perfectly highlights the sweet and tart flavor of fresh strawberries, with the delightful contrast of rich chocolate. It may seem simple, but we have some tips and tricks to make this classic recipe even easier. 


Ingredients:

1 pint of strawberries

1 cup of dark chocolate chips 

1 T coconut oil 

Sprinkles for decoration (optional)


Instructions:

Prepare a large baking tray with parchment paper. Set within reach of your stove. 

Wash and dry your strawberries. Don’t cut off the stems, as you’ll want to use them to hold onto your strawberries when dipping them in chocolate. 

Melt your chocolate using the double boiler method. To create a double boiler at home, you’ll need a pot and a heat-safe bowl that fits on top of the pot without falling inside of it. Take the large pot and fill it up halfway with water. Bring it to a boil and place the heat-safe bowl over the pot and add your chocolate and 1 tablespoon of coconut oil to the bowl. Bring the heat down to medium-high and make sure to stir the chocolate often to prevent it from burning at the bottom of the bowl. The chocolate will melt and once melted, you can reduce the heat to low and stir occasionally to keep it from solidifying again

We added 1 tablespoon of coconut oil to keep the chocolate from solidifying, as it takes a little while to dip all your strawberries into the chocolate. The coconut oil also gives the chocolate a glossy sheen once it’s cooled and set, in addition to keeping the chocolate from falling off all at once when you bite into the strawberry. 

Once your chocolate is ready, dip each strawberry and roll it in the chocolate until it’s completely covered. You can hold it by its stem and leaves if they’re still on the strawberry, but if not, you can hold it by sticking a fork or a toothpick into the top. 

As you go, set each finished strawberry onto the baking sheet. Add sprinkles to them if you desire. Repeat until you’ve dipped each one

Set your strawberries in the fridge and allow them to cool for at least 3 hours. 

Transfer them to a plate or a container with a lid. They will last up to a day in the refrigerator before they start leaking strawberry juice, although they’re so good they may all get eaten in the first hour!

Peanut Butter Cream Pie

Looking to expand your Thanksgiving pie repertoire beyond the traditional pumpkin, pecan and sweet potato? Give this delicious peanut butter cream pie recipe a try, and it’s sure to make its way into your holiday dessert rotation. It’s a Thanksgiving staple for my partner’s family and I look forward to it every year! Creamy peanut butter pudding, whipped cream and crunchy graham crackers crust come together to create a scrumptious no-bake pie. We hope you enjoy this perfectly peanut-buttery recipe.

Ingredients:

1 package of vanilla pudding mix
2 cups of milk (whole or 2% work best)
1 egg
½ cup unsalted peanut butter

Crust:

2 packages of graham crackers
12 T butter
½ cup honey

Toppings:

1 cup heavy whipping cream
1 T powdered sugar
½ cup powdered sugar
3 T peanut butter

Instructions:

First, prepare your pie crust.

Crush your graham crackers until there are no large chunks. You can do this using a food processor, or by hand using a sealable bag and smacking them with a heavy spoon.

Pour your crushed graham crackers in a large bowl and add your honey.

Melt your butter and pour it into the bowl, mixing well until the ingredients are combined.

Transfer your pie crust into an 8- or 9-inch pie pan, or a springform pan of a similar size. Press the dough into the sides and center of the pan at an even thickness.

Put the pie crust in the refrigerator to set.

While your crust is setting, you can prepare the pie filling.

In a medium sized pot, add your milk, pudding mix and egg. Set it on medium heat and stir constantly. When the pudding has begun to bubble and thicken, take it off the heat and continue to stir.

Transfer your pudding into the pie crust and smooth out the surface to create an even layer.

Next, you can prepare your toppings.

In a large mixing bowl, add your heavy cream and 1 T of powdered sugar. Whip your cream with a hand mixer until stiff peaks form. Set aside in the refrigerator.

In a small mixing bowl, add your peanut butter and ½ cup powdered sugar. Mix well with a fork until small clumps begin to form and the powdered sugar is fully incorporated.
With your toppings done, you can assemble your pie. Dollop your whipped cream on top of your pie and smooth it into an even layer, then sprinkle your peanut butter crumbles all over the top.

Put your pie in the refrigerator to set and chill completely for 1-2 hours before serving. Enjoy!

Vegan Cereal Treats

Cereal treats are a classic homemade confection that always remind me of cozy fall evenings. They’re perfect to make for a crowd and are always a hit. Our vegan version is simple and quick, but still has all the marshmallow-y goodness you crave. While the standard cereal treat is made with plain puffed rice cereal, your options for deliciousness are unlimited when you think outside the cereal box. Mix things up according to what you or your guest’s like best; try chocolaty rice cereal, fruity rice cereal, or whatever combination you think sounds tasty. We hope you enjoy this recipe.

Ingredients:

5 cups rice cereal (or cereal of your choice)

1 (10 oz) package of vegan marshmallows

4 T non-dairy butter

Instructions:

Grease an 8×8 pan or 9×9 pan with cooking spray or non-dairy butter and set aside.

In a large pot, add your butter and set to medium-low heat. Stir the butter frequently until melted to prevent it from burning.

On medium heat, add your marshmallows. I recommend using miniature marshmallows because they will melt faster than full-sized, but you can use what you have on hand.

Constantly stir the marshmallows and make sure that there are very few blobs of unmelted marshmallow in the pot.

Once your marshmallows have melted, add your rice cereal in. I recommend adding 3 cups of cereal first and folding them into the marshmallows until some of them have stuck together. Then add the rest of the cereal and mix until the marshmallows and cereal are fully incorporated.

Transfer your cereal treats to your prepared baking pan.

Spray some cooking spray or rub some non-dairy butter on your hands. This will prevent the marshmallow from sticking to your hands in the next step.

Gently press the cereal treats into the pan, making them an even thickness and filling in all the sides of the pan.

Allow the treats to cool for 10 to 15 minutes before cutting them into pieces.

Serve and enjoy! To keep them fresh, put them in an airtight container. The cereal will become stale very quickly and your treats will lose their crunch.


No-Bake Pineapple Tart (Vegan)

This chilled tropical dessert is sweet and tangy and perfect for summer. Best of all, this tart has a no-bake crust, so your kitchen can stay cool while you work. We hope you enjoy this recipe.

Ingredients:

1 5.4oz can of coconut cream
1 ½ cup pineapple (canned or fresh)
¼ cup sugar
2 T cornstarch
1 tsp vanilla extract

For the crust:

1 ½ cup almond flour
⅓ cup brown sugar
⅛ tsp salt
1 tsp vanilla extract
¼ cup vegan butter

Optional decoration:

Cut pineapple wedges


Instructions:

Add your almond flour, brown sugar and salt to a large mixing bowl. Stir to combine.

Melt your vegan butter. Add your vanilla extract and melted vegan butter to your dry ingredients, mixing until a loose dough forms.

Transfer your dough to an 8-inch pie dish or tart pan. Press the dough into the pan and up the sides until it’s firm and spread evenly around the pan. Set it in the fridge while you assemble the filling.

Blend your pineapple until it’s smooth. Set aside.

In a large pot over medium heat, add your can of coconut cream. Stir until the coconut cream is smooth and is at a low boil.
Add your blended pineapple, vanilla extract, sugar and cornstarch to the coconut cream. Stir constantly for 15 minutes, until most of the cornstarch has dissolved and the mixture is thick.

Pour your pineapple filling through a sieve or a fine strainer and into another bowl. This will remove the pineapple fibers or any undissolved cornstarch and make your tart filling smooth.

Gently pour your pineapple filling into your tart crust, spreading evenly.

Put the tart in the fridge to set, covered, for at least 8 hours before serving. Enjoy!

Honeycomb Toffee

This crisp, airy candy is popular in the United Kingdom and is often coated in chocolate to help preserve its unique texture. It may seem intimidating to make at first, but it’s a fun and interactive dessert that’s easy to make. I recommend reading over the entire recipe before you make this candy, just to make sure you have everything ready to make it. We hope you enjoy this delightful candy recipe.

Ingredients:
½ cup granulated sugar
4 T honey
1 ½ tsp baking soda

Optional chocolate coating:
1 cup chocolate chips, melted
1 T coconut oil

Instructions:
Prepare a baking sheet by lining it with parchment paper. Set it within your immediate reach. The reaction to create honeycomb toffee happens very quickly and you’ll want the baking sheet near you to make pouring the toffee go smoothly.
Put your baking soda into a small cup or bowl and set it within your immediate reach. Place a spatula and whisk within your reach as well.
In a medium sized pot on low heat, add your sugar and honey. Whisk them together until they’re combined and continue whisking occasionally as the sugar dissolves into the honey.
Once the syrup becomes smooth and you see very few sugar granules in the syrup, turn the heat up to medium and continue whisking.
When your mixture has turned the color of maple syrup and is bubbling, turn off the heat. This will take almost exactly 3 minutes.
Get ready for the reaction to take place.
Grab the handle of your pot and add your baking soda. Quickly whisk in the baking soda and the reaction will begin.
Whisk until the baking soda is just combined and pour the toffee out onto the prepared baking sheet, scooping it out with your spatula.
When you pour the toffee, try to spread it out across the pan as you go. You cannot spread it by smoothing it out once you’ve poured it because you will crush the bubbles that give the toffee it’s texture.
Allow the toffee to cool, about 30 minutes.
Once it’s cooled, cut the toffee with a knife, or smack it to shatter it into smaller pieces.
Coat the honeycomb toffee in chocolate if desired.
To make the coating, add your coconut oil to your melted chocolate and mix.
I recommend using chopsticks to hold the toffee as you dip it in the chocolate.
Allow the chocolate to cool and set and serve. Enjoy!

Lemon Cream Pie

We’re mixing things up this Thanksgiving with a new take on a classic pie. Lemon cream pie isn’t the typical fall dessert, but this recipe is a showstopper and is perfect for festive occasions. Its tartness is perfectly balanced by the sweet creamy filling, while the crust provides a satisfying crunch. We hope you enjoy this delicious recipe!

This recipe can be made vegan using vegan graham crackers, vegan butter, maple syrup, sweetened condensed coconut milk and non-dairy whipped topping. We have all these ingredients available for purchase at the Co-op.


Ingredients:

Crust:
2 packages of graham crackers
12 T butter
½ cup honey


Filling:

1 can sweetened condensed milk
½ cup fresh lemon juice
2 Tsp lemon zest
2 cups heavy cream


Topping:

Lemon Slices
1/2 cup heavy cream
½ Tsp cornstarch


Instructions:

Find the pan you’d like to use for this recipe and set it aside. This recipe makes a lot of filling, which requires you to use a dish with tall sides to hold it in. I recommend using an 8-inch pie pan with tall sides, about 2 to 3 inches tall. You can also use an 8-inch springform pan, which is what I used for this pie. Alternatively, you can also split this recipe into 2 pies in a standard-height pie pan. Just be mindful of the size of your pan.

Crush your graham crackers until they are the texture of coarse sand, with no large chunks of graham cracker left.

Melt your butter in a small saucepan or in a small bowl in the microwave.

Add your butter and honey to the ground graham crackers. Stir until fully combined.

Pat your crust into your pan in an even layer, creating a wall of crust along the side. Set your crust aside to make your filling.

Zest your lemons and put your lemon zest into a medium bowl.

Juice your lemons. Measure the juice and add it to your bowl.

Add your sweetened condensed milk to the lemon juice and zest and stir until combined.

In a large bowl, add your heavy cream and whip it on high with a hand mixer until you reach stiff peaks. Your whipped cream has reached stiff peaks when it stands on its own and makes defined ribbons and peaks as you’re whipping it.

Add your whipped cream to the lemon mixture. Gently fold the ingredients together until fully combined, careful to avoid deflating the whipped cream.

Spoon your filling into your crust. Make the surface level and smooth using a spatula or spoon.

Allow the filling to set in the refrigerator for at least 4 hours or overnight before decorating.

To decorate your pie, add your heavy cream and cornstarch to a bowl and whip it into stiff peaks. The cornstarch will help the whipped cream keep its shape for a longer period of time. Pipe the whipped cream onto the pie using a piping bag or a sandwich bag with the corner cut off. I recommend going in short puffs around the edge of the pie, as shown in the photo.
Slice your lemons and place them on your pie in the pattern of your choosing.

Your pie is ready to serve. Enjoy!


PB&J Cookie Bars (Vegan)

The classic peanut butter and jelly gets reimagined for dessert. These cookie bars are chock-full of rich peanut and sweet fruity flavor, just like your favorite childhood sandwich. These dessert bars can be made vegan for everyone to enjoy and they’re sure to fly right off the plate.


Ingredients:

9 T unsalted butter (vegan or regular)
⅔ cup peanut butter
1 cup brown sugar
1 ¼ cup granulated sugar
1 tsp vanilla extract
1 ½ cups flour
½ tsp salt
½ tsp baking powder


For the topping:

4 sheets of graham crackers
1 T butter
1 T peanut butter
1 jar of jelly or jam


Instructions:

Preheat your oven to 350°

Grease an 8×8 or 9×9 pan with butter or line it with parchment paper

Melt your butter in a small pot over medium heat.

When your butter has melted, add the peanut butter, and mix until combined.

Transfer your mixture into a large bowl.

Add your brown sugar, granulated sugar and vanilla extract to the bowl and stir until combined.

In a separate smaller bowl, add your flour, salt, and baking powder. Mix until combined.

Pour your dry ingredients into your wet ingredients and stir until they’ve just come together. Be careful not to overmix.

Pour the batter into your prepared pan and create an even layer of batter with a spatula.

Bake for 25 to 30 minutes, or until the sides become golden brown and a toothpick inserted in the center comes out clean. Allow it to cool for 10-15 minutes before adding any toppings.

While your cookie is baking, you can make the topping.

Heat a tablespoon of butter in a small bowl or saucepan. You can use a microwave or a stovetop.

Crush your graham crackers into crumbs and add them to the bowl.

Add a tablespoon of peanut butter to the bowl.

Stir the ingredients to combine them. This can be done with a fork or spoon, but it’s much easier when done with your hands.

Once your cookie has cooled, you can begin topping it.

Spread an even layer of jelly or jam over the top of the cookie, about ½ an inch thick.

Sprinkle a layer of your graham cracker topping on top of the jam, making sure to cover all the visible jam.

Cut it into squares and enjoy!


Peach Icebox Cake (Vegan)

Refreshing cold desserts are a great relief from the summer heat. This peach icebox cake can help you beat the heat and satisfy your sweet tooth. Using locally grown peaches and just a few ingredients from your pantry, this treat is simple to make and easy for everyone to enjoy.

Ingredients:

8 peaches
1 box vegan graham crackers
1 (15 oz) can of full-fat coconut milk

For the pudding:

Coconut milk + 2 T coconut cream
¼ cup sugar
½ T cornstarch
1 tsp vanilla extract

For the whipped cream:

Coconut cream
¼ cup sugar
1 T vanilla extract
1 tsp cornstarch


Put your can of coconut milk in the refrigerator for 3 to 4 hours before making your icebox cake. This will separate the coconut milk and coconut cream.

Peel, pit and slice your peaches. Set them aside.

Open your can of coconut milk. There will be a distinct layer of coconut cream at the top of the can. Scoop the coconut cream into a separate bowl and pour the coconut milk into a small pot. Take 2 tablespoons of the coconut cream and put it in the coconut milk, stirring to combine.

Set your coconut cream aside in the refrigerator.

Cook your pot of coconut milk over medium heat. Add the sugar, vanilla, and cornstarch to the pot. Whisk it constantly to dissolve the cornstarch and it thickens to pudding consistency. This will take 10-15 minutes.

Remove your coconut cream from the refrigerator to make your coconut whipped cream.

In a medium mixing bowl, add the coconut cream, sugar, vanilla extract, and cornstarch.

Whip the coconut cream using a hand mixer until soft peaks form.

Gather your coconut whipped cream, peaches, pudding, and graham crackers to assemble your cake.

In an 8×8 pan, add a layer of graham crackers to the bottom.

Pour your coconut pudding on top of the graham crackers.

Add a layer of peaches, saving some for the decoration on top.

Place another layer of graham crackers on top of the peaches.

Smooth the coconut cream on top of the graham crackers.

Top the cake with peaches and crumbled graham cracker pieces.

Refrigerate your icebox cake for 2 to 3 hours before serving. Enjoy!