Posts

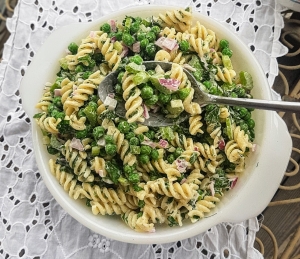
Lemon & Herb Pasta Salad

Lemon & Herb Pasta Salad Recipe

With Spring on the Horizon, You Might Be Craving Something Fresh & Bright…

Look no further than this tangy and herby pasta salad recipe. Pack it in your picnic basket or enjoy it after a day of spring cleaning. Either way, it’s sure to hit the spot. 

Ingredients for Pasta Salad & Dressing:

1 16oz bag fusilli pasta

1 cup frozen peas

4 large stalks celery (equal to 2 cups cut)

½ red onion

1 cup mayonnaise (you can use vegan mayo to make this recipe 100% vegan)

Juice from 2 lemons

3 tbsp fresh cut parsley

2 tbsp fresh dill 

2 tsp salt (or to taste)

2 cloves minced garlic

½ tsp ground black pepper (or to taste)

1 tsp lemon zest

Pasta Salad Assembly Instructions:

Some hours before you make your pasta salad, remove your frozen peas from the refrigerator to thaw. Drain away any excess water before you begin. 

Bring a large pot of water to a boil and cook your fusilli pasta according to the package instructions. 

While your noodles are cooking, cut your vegetables. 

Dice your celery and red onion. Toss in a large mixing bowl and set aside. 

Add your thawed peas to the bowl as well. 

Mince your garlic cloves if you’re not using pre-minced and add them to the bowl. 

Finely chop your parsley and dill. Add them to the bowl. 

Squeeze the juice from 2 lemons into your mixing bowl with the other ingredients. 

Zest one lemon’s worth of zest into the bowl. Toss your salt and pepper in as well. 

Add your mayonnaise into the bowl and stir until everything is well combined. Tast and adjust seasonings as needed. 

Your pasta should be done cooking by now, or sometime before you’ve finished prepping your vegetables and herbs. Remove it from heat and drain off the excess liquid. 

Add your pasta to the mixing bowl and mix well until everything is combined and the pasta is coated in mayonnaise. 

Allow it to cool in the refrigerator for at least 3 hours. 

Serve and enjoy. Keeps for up to a week if covered in the refrigerator. 


Chocolate Mousse

Valentine’s Day Dessert – Chocolate Mousse

This fluffy and rich dessert is perfect for a Valentine’s Day treat that feels fancier than your average chocolate. It comes together easily with a hand mixer and a little patience, with no complicated baking process. Pair it with a dry red wine to compliment the chocolate and enjoy it with someone special.

Ingredients for the Mousse:

8 oz semi-sweet chocolate

6 T butter (unsalted)

6 eggs 

¼ cup and 3 T granulated sugar, divided

1 T vanilla extract

Ingredients for the Whipped Cream:

1 cup heavy cream

3 T granulated sugar

Instructions:

To begin making your chocolate mousse, start by melting the chocolate using a double boiler. If you don’t have a double boiler, you can make one using a large pot and a heat-safe bowl that fits on top of the pot without falling inside of it. 

Take the large pot and fill it up halfway with water. Bring the water to a boil and place the heat-safe bowl over the pot.

Add your chocolate, vanilla extract, and butter to the bowl. I recommend chopping the butter up before adding it in, as it melts more evenly. 

Bring the heat down to medium-high and make sure to stir often to prevent it from burning at the bottom of the bowl. The chocolate will melt and once melted, you can reduce the heat to low and stir occasionally to keep it from solidifying again. Leave the chocolate on the stovetop this way while you work on preparing the other ingredients. 

Now it’s time to separate your egg yolks from your egg whites. First, have two large mixing bowls at the ready. You will put your egg yolks in one bowl, and your egg whites in the other bowl. 

I recommend breaking your eggs very gently, so as to not pierce the yolk. After it’s broken, hold the egg over your egg white bowl and pour it into your hand very gingerly. Allow the egg whites to fall from the spaces between your fingers and down into the bowl. Pass the egg yolk between your hands very gently until all the white has fallen into the bowl. Then gently set the remaining yolk into your egg yolk bowl. Repeat this process for all 6 eggs. 

Add ¼ a cup of sugar to your egg yolks and use an electric mixer to beat them until fluffy and creamy. This should take about 5 minutes of continuous beating at medium speed. Set aside.

Add 3 tablespoons of sugar to your egg whites and beat with an electric mixer until medium-stiff peaks. This should take about 3-4 minutes of continuous beating at high speed. Set aside. 

Fold your egg yolks into your chocolate mixture a little bit at a time until there are no streaks of yolk visible. 

Very gently, fold your egg whites into the chocolate mixture. I recommend using a figure 8 motion to help mix, gently scraping down the sides of the bowl as you go. Use very little force when mixing, to help keep your egg whites nice and fluffy. Fold and mix until you see almost no streaks of white in your chocolate mousse. It’s ok if you see a little streaking, as you’d rather have it 90% incorporated than lose most its fluffiness by over-mixing. 

Once you’re done mixing, transfer your mousse into ramekins. You could use eight 6 oz ramekins, or six 12 oz ramekins. If you don’t have any ramekins, you can also use spare cups or mugs of any size until you run out of mousse. 

Put your chocolate mousses in the refrigerator, covered, for at least 4 hours or overnight.

Before serving, make some whipped cream to go on top of your mousses. 

Add your heavy cream and 3 tablespoons of sugar to a large mixing bowl. 

Mix with an electric mixer on high speed until it’s fluffy and hold its shape. This takes about 6 minutes.

Spoon the whipped cream on top of your mousse and enjoy, with an optional side of dry red wine to compliment the chocolate. 


Try out this Chocolate Mousse recipe and let us know what you think.

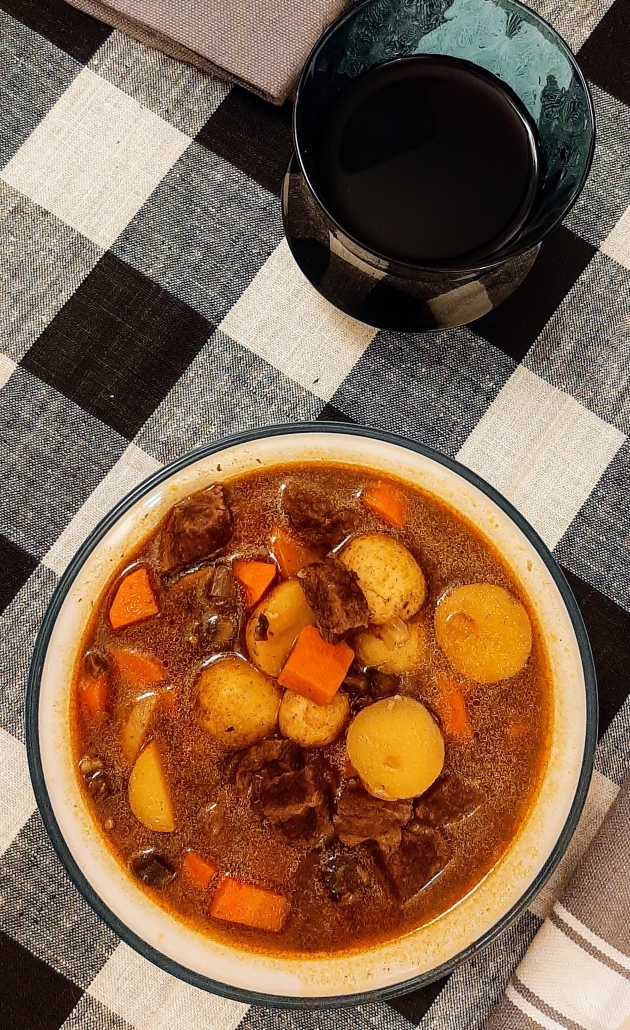
Beef Burgundy

Valentine’s Day Beef Burgundy

Staying in for Valentine’s Day? Impress your date with an extravagant meal, paired with wine and a lovely chocolate dessert. While this dish has all the trappings of a premium dining experience, it’s easy to prepare and less expensive than a 5-star French bistro. Your favorite dry red pairs wonderfully with this dish, and better yet, you can use the same wine in the stew. Set the table and put on some mood lighting as you enjoy this curated meal from the comfort of your home. 

Ingredients:

1 ½ lbs. of stew beef or beef chuck

1 ½ tsp salt (plus more to taste)

½ tsp pepper (plus more to taste)

2 T all-purpose flour

1 onion

2 carrots

8 oz cremini mushrooms

1.5 lbs. little gold potatoes

2 cloves garlic, minced

1 tsp tomato paste

2 T extra virgin olive oil

1 cup dry red wine

4 cups beef broth

2 large bay leaves


Instructions:

If you’re using beef chuck, roughly chop it into chunks.
In a large bowl, add your beef and 1 ½ tsp salad and ½ tsp pepper. Mix until coated and set aside. 

Chop your onions. Peel and chop your carrots. Set aside. 

Mince your garlic if you’re not using pre-minced. Set aside. 

Wash and chop your mushrooms. Set aside. 

In a large soup pot on medium heat, add your mushrooms, onions, carrots, and 1 tablespoon of olive oil. Sauté for 10 minutes, stirring occasionally. 

Add your garlic to the pot and sauté until fragrant. 

Pour in your dry red wine and let it come to a boil.
Add your tomato paste, bay leaves, beef broth, a pinch of pepper, and a pinch of salt if desired. Bring everything to a boil. Allow it to keep boiling while you prepare your potatoes. 

Wash your potatoes and cut them in half. Carefully add them to the pot. I recommend lowering them a few at a time using a ladle. Allow it to keep boiling on medium heat. 

Remove your beef from the bowl and transfer it into a pan with 1 tablespoon of olive oil. Sear the beef on both sides using medium-high heat. 

Once seared, add only the beef to the pot, leaving the grease and fat in the pan. 

Add your flour to the pan and whisk until all the fat has been absorbed. Add it to the pot. 

Simmer the beef stew on medium-low or low for 2 hours, stirring occasionally to ensure nothing is sticking to the bottom of the pot.

Serve and enjoy with a glass of dry red wine. 


Let us know what you think of this Beef Burgundy Recipe!

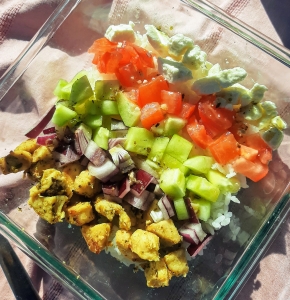
Meal Prep Chicken Souvlaki

Is your New Year’s resolution to save a few dollars on lunch and bring your own? This recipe for an easily prep-able and pack-able lunch that’s filling and delicious. It’s easy to make, even if you aren’t the most skilled cook, without skimping on flavor. We hope you enjoy your homemade lunch!


 

Ingredients for the chicken:

Around 1 ½  lbs. chicken breasts

3 T olive oil

Juice from 1 large lemon (or 2 small lemons)

1 clove garlic, minced

2 T dried oregano

Salt and pepper to taste


Ingredients for the sides:

2 cups dry long grain rice (white or brown)

1-2 cucumbers

1 red onion

3 tomatoes 

Feta cheese


Ingredients for the Greek vinaigrette:

¼ cup extra-virgin olive oil

3 T red wine vinegar

1 clove garlic, minced

½ tsp dried oregano

¼ tsp Dijon mustard

¼ tsp salt

A pinch of ground black pepper


Instructions:

Cut your chicken breast into chunks. Put them in a large bowl and set aside. 

Mince your clove of garlic, if you’re not using pre-minced. Add it to the bowl.
Cut your lemon in half and remove the seeds. Juice it directly into the bowl. 

Add your olive oil, friend oregano, salt, and pepper. Stir everything to combine.

Cover your bowl and set it in the refrigerator while you work on your rice, vegetables, and dressing. 

Prepare your rice according to the instructions on the package. 

While your rice is cooking, you can make your dressing and chop the vegetables. 

Mince another clove of garlic if you’re not using pre-minced. Add it to a container of your choice with a sealable lid. 

Add your olive oil, red wine vinegar, dried oregano, Dijon mustard, salt, and pepper to the container. Seal the lid on tight and shake until everything is well combined. Put it in the refrigerator. 

Peel and chop your cucumber. Chop your red onion and tomatoes. Set them in a sealable container and put them in the refrigerator.

Remove your marinating chicken from the refrigerator and pour everything into a pan on medium-high heat.

Cook the chicken in the pan until it’s fully cooked and has some color on both sides. 

Put it in a sealable container and set it aside to cool down for a few minutes before putting it in the refrigerator. 

The night before or the morning of, pack yourself a lovely lunch! Put some rice and chicken in a container along with your veggies, plus a sprinkling of feta cheese if you desire. Pack a little container of your dressing to put on top later. If you want a hot lunch, I recommend packing the veggies in a separate little container, so you can heat up your chicken and rice. Throw in some utensils and a drink, and you’re set for lunch. 

Speculaas Cookies

Speculaas cookies, originating from the Netherlands and Belgium, are the classic Christmas you knew you loved but never had a name from. They’ve made appearances on your grandmother’s tray of homemade cookies, the dessert bar at an office holiday potluck, or in a festive unlabeled treat tin gifted to you by a friend. Wonderfully spiced, slightly crunchy, and lightly flavored by roasted almonds, they are easier to make than you might have thought. I hope this recipe is exactly what you were looking for this holiday season. 

Ingredients:

½ cup blanched and slivered almonds

1 ½ cup all-purpose flour

½ tsp baking soda

2 tsp ground cinnamon

½ tsp ground ginger

¼ tsp ground cardamom

¼ tsp ground nutmeg

¼ tsp ground cloves

A pinch of ground black pepper

A pinch of sea salt

½ cup of butter, softened

½ cup brown sugar

1 egg


Instructions:


Preheat your oven to 450°F.

Set your butter on the countertop to soften.

Put your blanched and slivered almonds on a baking sheet lined with parchment paper. When your oven is done preheating, pop them in and toast them for 7 to 8 minutes, or until they are golden brown and fragrant. Set them aside to cool. 

In a large mixing bowl, add your flour, spices, baking soda, and salt. Whisk together to combine. 

Using a blender or food processor, grind your almonds with 2 tablespoons of your flour mixture.

Add the almond blend to your dry ingredients and whisk together until incorporated. 

In another large mixing bowl, cream together your butter and sugar using a hand mixer. Blend until it’s nice and fluffy and the sugar is well incorporated. 

Add your egg to the butter mixture and blend until fully combined. 

Pour your wet ingredients into your dry and mix until a dough forms. 

Form your dough into a solid ball and wrap it well in plastic wrap or bees wrap. Make sure no air can get in.

Set your dough in the refrigerator for at least 3 hours, or overnight if you can. 

After your dough has rested, its’ time to roll it out and bake your cookies. 

Preheat your oven to 350°F. 

Line 2 baking sheet with parchment paper and set aside. 

On a large, well-floured surface, roll out your dough to about 1/8th inches thick. Flour your cookie cutter and cut out your shapes. When you run out of room for shapes, re-form the dough and repeat. Set your cut-out cookies on your baking sheets.

Once you’ve filled a sheet, set it in the oven and bake for 12-12 minutes. Bake until your cookies are fragrant and just barely golden brown on the edges. The spices and brown sugar make it harder to tell when these cookies are ready, so keep an eye on them to make sure they don’t burn. This recipe makes a little over 3 dozen cookies, so you’ll repeat this a few times.

Set your cookies out to cool when they’re done. Once cooled, set them in an airtight container and they’ll keep for at least a week. Enjoy!


Green Bean Casserole

Nothing says “Thanksgiving” like a green bean casserole, and we’ve whipped up a classic version for you to make this holiday season. There are some regional variations of this dish, plus a dozen ways you can dress it up. Whether you put bacon, cheese, or vegan butter in your green bean casserole, you’re sure to enjoy every spoonful. 

Ingredients:

1 lbs. fresh green beans

2 T butter

1 can cream of mushroom soup

½ tsp ground black pepper

1 T salt

2 cloves garlic, minced

2 T all-purpose flour

1 container french fried onions


Instructions:


Wash your green beans and cut off the ends. Chop them into medium sized pieces and set aside. 


Preheat your oven to 400°F. 


Bring one gallon of water to a boil in a large pot. Add one tablespoon of salt. 


Add your green beans and blanch them for 5 minutes. 


Drain the green beans and rinse them with cool water. 


Add your green beans to an 8”x8” or 9”x9” oven safe dish and set aside. 


In a saucepan on medium heat, melt your butter. Add your garlic and sauté until fragrant. 


Pour your cream of mushroom soup into the pan and stir until heated through. 


Add your flour and black pepper and stir until combined. Simmer for 3 minutes and stir occasionally, or until it begins to thicken. 


Pour the cream of mushroom soup mixture into the pan with your green beans. Smooth it out to make an even layer. 


Sprinkle the entire container of french fried onions on top, making sure to cover completely. 


Bake for 15 minutes. 


Allow it to cool before serving and enjoy. 

Sage Bird Ciderworks Hot Mulled Cider Recipe

Embrace the cozy embrace of autumn with Hot Mulled Cider! Crafted with the magic of Sage Bird Ciderworks and a blend of mulling spices, this warm elixir will wrap you in a comforting hug. Heat gently on the stove or let it simmer in a crockpot for an aromatic hour, infusing it with the zesty allure of sliced orange rounds, vibrant cranberries, and rustic cinnamon sticks. Pour this liquid warmth into your cherished mugs and savor the heartwarming essence of the season

Ingredients:

1 Bottle of Your Favorite Sage Bird Cider – we recommend Winesap or Wickson!

Mulling Spices

1 Orange, sliced into rounds

1/2 Cup of Cranberries

1-2 Cinnamon Sticks


Instructions: 

Follow directions on mulling spices and add to your favorite Sage Bird Ciderworks cider.

Heat on the stove on medium for ~5-7 minutes, or in a crock pot for an hour.

Add sliced orange rounds, cranberries, and cinnamon sticks to the pot.

Serve in your favorite mugs!

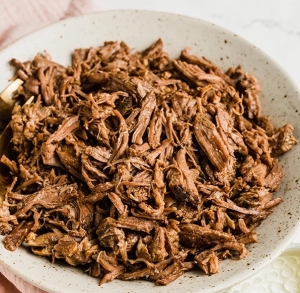
Slow Cooked Shredded Beef

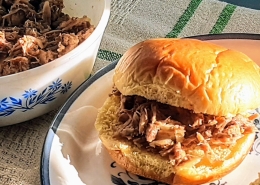
It could just be me, but when I cook shredded beef with all the fixin’s, it’s finally Fall. This recipe is perfect for when the weather begins to get a little milder, and you’d like something warm and hearty. Better yet, you can adjust it based on how many people you’ll be feeding and how big your crock pot is. On top of that, it freezes beautifully, so you can tuck some away to enjoy later if you make too much. 


Ingredients:

2-4 lbs.* Boneless Strip Loin Roast or Chuck Roast

Shenandoah Valley Spice Company’s Butcher’s Blend

1-2 cups water

*We recommend ½ lb. of meat per person, so the size roast you’ll be using for this recipe depends on how many you’re serving


Instructions:

For this recipe, you’ll need a slow cooker or crockpot. 


This recipe takes about 8 hours to cook completely. Keep this in mind when you start the process to ensure it will be ready by the time you’d like to eat it.


Cut up your roast into large chunks and put them into your crock pot or slow cooker. 


For every 1 lb. of meat you’re cooking, add 1 ½ tablespoons of the Shenandoah Valley Spice Company’s Butcher’s Blend into the pot. 


Add enough water to cover the meat most of the way. It’s ok if a little is poking out of the very top, as long as most of it is submerged. 


Turn it on low heat and cook for 8 hours. 


Once it’s done, remove the chunks of meat and transfer them into a bowl. Shred them apart using a fork, then put the meat back inside. 


Serve with your favorite sides and enjoy!

Vegan Zucchini Bread

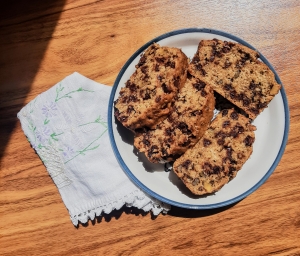
If your backyard garden is filled to the brim with zucchini, baking some fresh zucchini bread is a classic and delicious solution to handle the surplus. Perfect for sharing with friends and neighbors, it makes a wonderful treat. Doll it up with some walnuts and chocolate chips, make it plain, or customize the fillings to your liking. Serve it up for breakfast, as an afternoon snack, or just because. 

 

Ingredients:

1 cup brown sugar

⅔ cup non-dairy milk

½ cup neutral oil (canola, vegetable, avocado, grapeseed, sunflower, safflower or peanut)

T lemon juice

1 ¼ tsp ground cinnamon 

¾ tsp salt

2 cups coarsely grated zucchini (about 2 medium sized zucchini)

2 cups all-purpose flour

1 tsp baking powder

½ tsp baking soda

1 cup dairy-free chocolate chips (optional)

1 cup chopped walnuts (optional)


Topping:

1 T turbinado sugar


Instructions:


Preheat your oven to 350°F. 


Prepare an 8 ½ inch by 4 ½ inch loaf pan by spraying it with cooking spray or butter it with vegan butter. 


Cut a piece of parchment paper to line the widest part of your loaf pan. Leave a little extra parchment paper sticking out of the pan so you’ll have a little tab you can use to pull the bread out of the pan once it’s finished baking.  


Grate your zucchini and transfer it into a dish towel or cheesecloth. Squeeze the zucchini while it’s inside of the cloth to drain the excess moisture.


In a large mixing bowl, add your drained zucchini. 


Whisk your brown sugar, non-dairy milk, oil, lemon juice, cinnamon and salt into the large bowl with the zucchini until everything is well combined. 


In a separate large mixing bowl, add your flour, baking powder, baking soda and whisk them together until incorporated. 


Add the dry ingredients to the wet ingredients, along with your walnuts and chocolate chips. 

Fold everything together until just combined, then transfer it to your prepared loaf pan. 


Smooth out the top of the batter to make it even and sprinkle your turbinado sugar on top.


Bake for 50 to 65 minutes depending on your oven, until the top of the bread is golden brown and the bread is puffed up and fluffy. 


Remove from the oven and allow it to cool in the pan for 15 or so minutes before removing it to cool completely.


Slice it up as you see fit and enjoy!

Meet Our Board – Amanda Presgraves

Co-op Board Elections are fast approaching, and we wanted to give you the chance to digitally meet some of current board members. If you’re a co-op owner and you’re interested in becoming a board member you can find out more information here. Board candidate elections are due by September 25th and elections will be held from October 2-30.

NAME : Amanda Presgraves

YEARS ON BOARD: This is my first year!

RECENT BOARD DISCUSSIONS

    • Creating a more just and equitable grocery store for the community 
    • New board member elections (these are coming up, ask me about this!)
    • General Manager status report and monitoring 

Current Favorite Recipe?

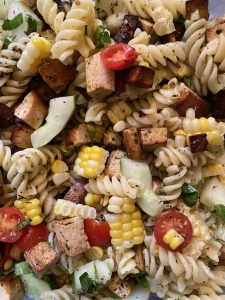
Chilled Late-Summer Pasta Salad

        • Boil: a pack of noodles at the Co-op (I often lean on the Field Day brand, which was on sale for 99c last week – usually $1.99!)  
        • Saute: cubed tofu, marinated in olive oil, balsamic vinegar and italian seasonings
        • Chop seasonal produce: we use cherry tomatoes, basil and peppers from our garden, and get our cucumbers and corn from either the Co-op or a neighbor’s garden
        • Quick dressing: mix together a good pour of olive oil, a few splashes of vinegar (we use apple cider vinegar) and lemon juice, italian, seasonings, and dashes of salt and pepper, and a wee bit of honey.
        • Mix it all together and refrigerate for a delightful, summer-produce-abundant, cooling pasta salad

What is your dream weekend in the Shenandoah Valley?

    • A weekend camping in the National Forest – including, but not limited to – catching an overlook sunrise, returning to Chestnut Ridge coffee and an egg-toast-veggie breakfast in the cool morning air, a day-long run or mountain bike ride with my pup Mistie and husband, Andrew…followed by a refreshing river dip. Then, we gotta top it off with a camp-cooked dinner or Boboko when returning home on Sunday, for the complete experience. 


How/Why did you start shopping at the co-op?

    • When I was a student at JMU and first began living off campus, my Sunday’s were the one and only day I had off from collegiate swimming. That rest day (me-day!) was my rare opportunity to venture out into the community. I’d sleep in, do my stretching, then bike to the Co-Op and peruse the aisles for deals on a *very hungry athlete* college budget – usually, stocking up on bulk goods before cruising home to study and prep lunches and dinners for the week. I look back at that time fondly, and now understand it was the beginning of a routine part of my life to come. 


What do you think makes the co-op special or different from other grocery stores?

    • The people. Very rarely does a shopping experience feel so easy, calming and friendly. Everything from the walk or bike to the store, browsing the 99c produce bin, and without-fail bumping into a friend in the produce aisle, before chit-chatting with the most thoughtful cashiers (who always remember the little details about my life!). It’s the experience. Feeling a part of our small but intimate Harrisonburg community.