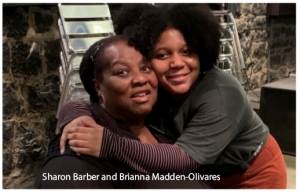
There’s something nostalgic and heartwarming about an apple pie. To commemorate Black History Month this February, we’d like to share this recipe, sent to us by Sharon Barber and Robin Lyttle from the Shenandoah Valley Black Heritage Project. You can learn more about the Shenandoah Valley Black Heritage Project by visiting their website.
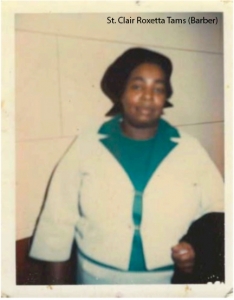 Sharon Barber is a founding member of the Shenandoah Valley Black Heritage Project and has been their Secretary since 2016. She was born in Rockingham County and graduated from Lucy F. Simms School in Harrisonburg, before it became the Simms Center. Sharon’s family has been living in the Shenandoah Valley for generations. Her grandmother, Clara Wallace, was born in Mt. Solon in 1890 and lived in Harrisonburg. Her home was located across from the Friendly City Food Co-op, where the 7-Eleven stands now. Sharon’s mother, St. Clair Roxetta Tams, was born in Harrisonburg and lived here until her passing in 1987. Her family can trace their lineage back to a man named Benjamin Curtis, born in 1756, in addition to the Curtis and Wallace families. These families were born free and worked as blacksmiths, farmers and peddlers in the area. In the 1860’s, several members of these families migrated to Ohio, but many families remained in the Shenandoah Valley and have descendants in the area to this day. In the 1900’s, there were many members of these families cooking professionally in and around Harrisonburg.
This recipe for apple pie was passed down in Sharon’s family from her grandmother, Clara Wallace Tams. Her mother wrote it down for her after many years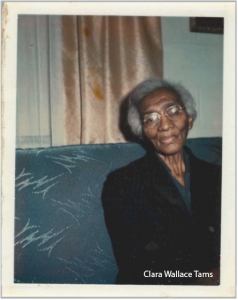 of enjoying it with her family. Sharon warmly remembers her mother’s and grandmother’s cooking. After speaking with her friend and President of the Shenandoah Valley Black Heritage Project, Robin Lyttle, Sharon recalled their baking fondly.
“We loved everything our mother cooked. She made pies, cakes, rolls, eclairs. We loved it all. I know my mother learned from her mother. When I got married, my mother wrote down the recipes for me and I learned from following her recipes. My grandmother lived where the 7-Eleven is now (across from the Friendly City Food Co-op). I remember going there and watching her cook on her stove that was a coal cook stove. They would get the coal and that is what they used. My family didn’t go to the store much. My father hunted and fished, and they would go to the gardens in the neighborhood. My mother canned everything; peaches, pickles, apples. Grandma taught my mom and they would work for days, canning. We just loved it all. I miss those days.”
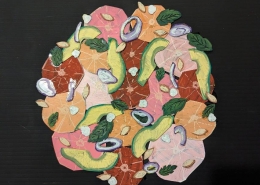
 We’d like to thank Sharon for sharing this recipe with us and honor the memory of her mother and grandmother. Recipes passed down through a family are very special and Sharon’s recipe makes a simply wonderful pie that everyone will love. It has all the warm spice and sweetness you could desire in an apple pie, thinly sliced apples for the perfect apple filling and an incredibly tasty golden crust. We hope you’ll enjoy Sharon’s pie as much as we did and will want to thank her, too!
For this pie recipe, it’s recommended that you use Stayman apples or Winesap apples. The Co-op regularly carries Stayman apples on the 99 cent table outside, and they are delicious in this pie. If these varieties are unavailable or out of season, any sweet and red apple with a softer texture will work wonderfully in this pie. The pie’s crust calls for Crisco®. Any vegetable shortening you have on hand should work in this recipe, including the Spectrum™ vegetable shortening you can find at the Co-op.
Ingredients: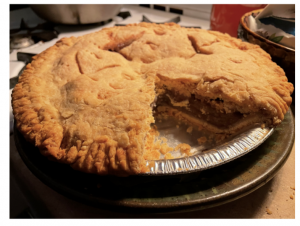
For the Crust:
2 ⅔ cup sifted all-purpose flour
½ cup Crisco® or vegetable shortening
½ tsp salt
⅛ tsp baking powder
8 – 10 T whole milk
For the Filling:
5-6 apples (Stayman apples work the best)
1 ½ cup sugar
1 tsp cinnamon
1 tsp allspice
1 tsp nutmeg
½ cup water
1 T white vinegar
1 T butter
Instructions:
Preheat your oven to 350°.
Prepare two large sheets of wax paper and set aside.
For your pie crust, add your vegetable shortening, four, salt and baking powder to a large bowl. Mix the ingredients together by hand or with a fork. The mixture will feel similar to corn meal and slightly stick to itself when it is ready. This may take 5 to 10 minutes.
Add 8 tablespoons of whole milk and mix the dough together with a fork. The dough is ready when it is crumbling but is sticking to itself. If your dough has not come together at all after adding the milk, add another 1 to 2 tablespoons until it comes together.
When your dough is ready, cut it in half. Set one half aside.
Transfer one half of your pie dough to your prepared sheet of wax paper. Place the second sheet on top.
With a rolling pin, roll your pie crust out to about 1/8th of an inch thick. This is about the height of 2 quarters stacked on top of each other.
Lay your pie crust into your pie pan and lightly press it into the pan to shape it. Trim any excess crust around the sides and set them aside.
Roll out your second pie crust using the same method as the first crust. Once it is rolled out, leave the crust between the sheets of wax paper to prevent sticking. Set both crusts in the refrigerator, placing the second crust on top of the pie pan.
In a large bowl, add your sugar and spices. Mix them together until combined. Set aside.
Wash and dry your apples. Do not peel them. Cut the apples in half and remove the core and seeds carefully.
Place the apples face-down on a cutting board and slice them thinly, between 1/8th to 1/4th of an inch thick. Place your chopped apples in your large bowl as you slice them.
When you have sliced all your apples, pour your water and vinegar overtop of them. Stir the mixture until combined. There will be liquid left at the bottom of your large bowl due to the water. This is a reminder to discard this liquid and not to pour it into your pie.
Remove your pie crusts from the freezer. Add your apple filling to the pie crust in your pie pan. Do not add the liquid at the bottom of the bowl to your pie. Spread the apple filling evenly across the pie.
Chop up your tablespoon of butter and place it across your apple filling, spreading it evenly.
Remove your second pie crust from the wax paper and drape it on top of the pie. Crimp the edges with a fork or with your fingers to seal the pie. Trim off any extra dough on the sides of the pie.
Cut several thin vents around the pie’s surface, about 6 to 8 vents. This is where you can get creative with the design of your pie. You may also use the trimmings from your earlier pie crusts to create designs or cut out shape to put on top of your pie crust.
When your pie is sealed, vented and decorated, place it in the oven. Bake it for 1 hour and 15 minutes. It should be golden brown on top and around the edges.
Remove it from the oven and allow it to cool, about 2 hours. If you enjoy your pie warm, cool for about 1 hour before serving. Serve by itself or with a side of vanilla ice cream. Enjoy!