Potato Leek Soup

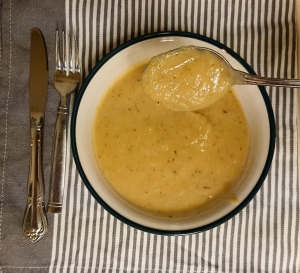
There’s nothing like settling in with a hot bowl of soup to warm you up during the coldest time of the year. This wonderfully savory and smooth potato leek soup will certainly do the trick, plus it’s vegetarian and can be made vegan. We hope you enjoy this comforting soup during the cold months ahead.

Ingredients:

2 lbs. yukon gold potatoes

6 cups vegetable broth 

4 leeks 

3 garlic cloves

1 tsp salt

½ tsp dried thyme

¼ tsp black pepper

½ cup plain greek yogurt (optional)


Instructions:

Begin by preparing your vegetables. Chop and clean your leek. You can do this by chopping your leek in half lengthwise, stopping where the fronds start emerging from the stalk. Turn the leek over on its side by 90 degrees and chop again, cutting it into 4 segments. Fan out the sections on the inside of the leek, using the fronds as a handle. Wash out any dirt inside the leek. Press the sections back together and chop finely. Set aside. 

Wash and peel your potatoes. Chop them into chunks and set aside. 

In a large stockpot, add your oil and leeks. Cook them for about 10 minutes, stirring occasionally to cook them evenly. Add your garlic, thyme, salt, and pepper and cook for another 5 minutes. 

Pour in your vegetable broth and potatoes. Bring the pot to a boil, then reduce the heat to medium and cover with a lid. Let it simmer for 30-40 minutes, stirring occasionally to keep things from sticking to the bottom of the pot. 

Once your soup has finished simmering, remove from heat and allow it to cool 10-15 minutes. 

Using an immersion blender, food processor or a regular blender, blend the soup until smooth.

Note: You may have to do this in batches depending on the size of your blender or food processor. If you are using a blender, I recommend waiting until the soup has completely cooled before blending, as the pressure of a hot liquid in a sealed blender can be dangerous and cause your blender to leak or possibly explode. You can then reheat the soup in the pot before serving. 

Stir in your yogurt, if using, and serve. Enjoy!


Lindsay’s Carrot Cake Recipe

We’re dedicating this wonderful recipe to an equally wonderful person, Lindsay! She has been
with the Co-op for 7 years as our Brand Manager and she’ll be retiring this December. We’ll
miss her dearly, but we’re excited that we get to see her off into a new chapter of life.
For any big event, a cake is certainly required, and we’ve cooked up a delicious recipe with
some of Lindsay’s favorite flavors. This carrot cake is topped and coated with a white chocolate
cream cheese frosting that perfectly balances the sweet spiciness of the carrot cake
underneath. It’s perfect to enjoy at upcoming holiday celebrations or any gathering where cakes
can be found.

Ingredients:
2 ½ cups flour
1 ½ tsp ground cinnamon
½ tsp ground nutmeg
½ tsp ground cloves
¼ tsp ground allspice
1 tsp baking soda
1 cup melted butter
2 cups sugar
1 T vanilla extract
4 large eggs
3 cups peeled and grated carrots
1 cup chopped and roasted pecans

For the frosting:
12 oz cream cheese, softened
8 oz of white chocolate
½ cup unsalted butter, softened
½ tsp vanilla extract
½ cup powdered sugar

Instructions:
Preheat your oven to 350°F.

Set your cream cheese and butter on the kitchen counter to reach room temperature before
making your frosting.

Prepare three 9-inch cake pans by greasing them with butter or cooking spray. Cut out 3 pieces
of parchment paper to fit in the bottom of the pan and press it. Set your pans aside.
Note: If you don’t have enough cake pans, you can also bake the remaining cake batter in
muffin tins at a shorter baking time.

If you’re using un-chopped and unroasted pecans, chop them into medium chunks and prepare
a baking tray with parchment paper. Toast the pecans in the oven as it’s warming up, about 10
minutes or until your kitchen begins to fill with the smell of roasted pecans. Check on them
every few minutes to make sure they aren’t burning. Set them aside to cool while you prepare
your carrots.

Wash and peel your carrots. Grate them and set them aside. I recommend grating them directly
into the measuring cup, as it’s difficult to predict how many carrots you’ll need. Set them aside.

Melt your butter over the stove in a small saucepan. Allow it to cool while you prepare your dry
ingredients.

In a medium bowl, add your flour, cinnamon, nutmeg, cloves, allspice, and baking soda. Whisk
them together and set aside.

Transfer your melted and slightly cooled butter to a large mixing bowl. Add your sugar and
vanilla extract, whisking until there are no dry spots of sugar.

Add your eggs to the large mixing bowl one at a time, beating in each one to incorporate.

After adding all your eggs, stir in your pecans and carrots until combined.

Slowly fold in your dry ingredients a few cups at a time until the batter is formed, avoid
overmixing.

Pour your cake batter into your prepared pans. Bake for 35-40 minutes or until a knife inserted
in the cake comes out clean. If baking cupcakes, bake for about 20-25 minutes. Set aside to
cool completely while you make the frosting.

Using the microwave or a double-boiler method, melt your white chocolate. To use the double-
boiler method, you will need a saucepan or pot and a mixing bowl that sits on top of it
comfortably. Fill the saucepan or pot with water about halfway and heat it until boiling. Place a
metal mixing bowl on top of the saucepan and add the white chocolate.

Allow your white chocolate to cool slightly, about to where you could stick your finger in it and
not get burned. This will prevent the butter from melting too much when you add it to the
frosting.

In a medium bowl, add your room temperature cream cheese, room temperature butter and
vanilla extract. Beat with a hand mixer until combined.

Add your melted and cooled white chocolate and mix until combined.

Time to assemble your cake. Between each layer, I recommend adding about 2 heaping spoons
of frosting. Spread each layer evenly and smooth out the top of the cake. Use the remaining
frosting for the sides, or leave it unfrosted. You can decorate it with some pecans placed around
the cake, or leave it plain. Enjoy!

Peanut Butter Cream Pie

Looking to expand your Thanksgiving pie repertoire beyond the traditional pumpkin, pecan and sweet potato? Give this delicious peanut butter cream pie recipe a try, and it’s sure to make its way into your holiday dessert rotation. It’s a Thanksgiving staple for my partner’s family and I look forward to it every year! Creamy peanut butter pudding, whipped cream and crunchy graham crackers crust come together to create a scrumptious no-bake pie. We hope you enjoy this perfectly peanut-buttery recipe.

Ingredients:

1 package of vanilla pudding mix
2 cups of milk (whole or 2% work best)
1 egg
½ cup unsalted peanut butter

Crust:

2 packages of graham crackers
12 T butter
½ cup honey

Toppings:

1 cup heavy whipping cream
1 T powdered sugar
½ cup powdered sugar
3 T peanut butter

Instructions:

First, prepare your pie crust.

Crush your graham crackers until there are no large chunks. You can do this using a food processor, or by hand using a sealable bag and smacking them with a heavy spoon.

Pour your crushed graham crackers in a large bowl and add your honey.

Melt your butter and pour it into the bowl, mixing well until the ingredients are combined.

Transfer your pie crust into an 8- or 9-inch pie pan, or a springform pan of a similar size. Press the dough into the sides and center of the pan at an even thickness.

Put the pie crust in the refrigerator to set.

While your crust is setting, you can prepare the pie filling.

In a medium sized pot, add your milk, pudding mix and egg. Set it on medium heat and stir constantly. When the pudding has begun to bubble and thicken, take it off the heat and continue to stir.

Transfer your pudding into the pie crust and smooth out the surface to create an even layer.

Next, you can prepare your toppings.

In a large mixing bowl, add your heavy cream and 1 T of powdered sugar. Whip your cream with a hand mixer until stiff peaks form. Set aside in the refrigerator.

In a small mixing bowl, add your peanut butter and ½ cup powdered sugar. Mix well with a fork until small clumps begin to form and the powdered sugar is fully incorporated.
With your toppings done, you can assemble your pie. Dollop your whipped cream on top of your pie and smooth it into an even layer, then sprinkle your peanut butter crumbles all over the top.

Put your pie in the refrigerator to set and chill completely for 1-2 hours before serving. Enjoy!

Vegan Cheese Ball

Making an appetizer that pleases everyone can be quite the feat, but this vegan cheese ball is up for the challenge. This creamy and savory recipe can be paired with crackers or vegetables to fend off your hungry guests until dinner is ready. This cheese ball is vegan and packed with flavor so everyone can enjoy every bite. We hope you enjoy this retro recipe.

Ingredients:

8 oz vegan cream cheese
1 cup vegan cheddar cheese, shredded
1 green onion
2 tsp vegan Worcestershire sauce
½ tsp dried parsley flakes
½ tsp dried garlic powder
½ tsp dried oregano
⅙ tsp black pepper (a pinch)

Coating:

½ cup vegan cheddar cheese, shredded

Instructions:

Take your vegan cream cheese out of the refrigerator to soften 5 to 10 minutes before you begin making your cheese ball.

In a large bowl, add your vegan cream cheese and beat it with a hand mixer until smooth. You can also smooth it with a heavy wooden or metal spoon, which will take a little longer. Set aside.

Chop your green onions and add them to the cream cheese.

Add your shredded vegan cheddar to the bowl along with your vegan Worcestershire sauce, parsley flakes, garlic powder, oregano and black pepper. Stir until the ingredients are evenly combined and there are no clumps of unincorporated vegan cream cheese.

With clean hands, form the cream cheese into a ball.

Using either beeswax wrap, a cheesecloth, or plastic cling film, tightly wrap the cheese ball to help it keep its shape. Set it in the refrigerator for at least one hour to chill.

After it’s chilled and set in its shape, remove the wrapping and pat on the remaining vegan cheddar shreds to coat the cheeseball.

Serve immediately with crackers or celery sticks or save it in the refrigerator for up to one week. Enjoy!

Vegan Cereal Treats

Cereal treats are a classic homemade confection that always remind me of cozy fall evenings. They’re perfect to make for a crowd and are always a hit. Our vegan version is simple and quick, but still has all the marshmallow-y goodness you crave. While the standard cereal treat is made with plain puffed rice cereal, your options for deliciousness are unlimited when you think outside the cereal box. Mix things up according to what you or your guest’s like best; try chocolaty rice cereal, fruity rice cereal, or whatever combination you think sounds tasty. We hope you enjoy this recipe.

Ingredients:

5 cups rice cereal (or cereal of your choice)

1 (10 oz) package of vegan marshmallows

4 T non-dairy butter

Instructions:

Grease an 8×8 pan or 9×9 pan with cooking spray or non-dairy butter and set aside.

In a large pot, add your butter and set to medium-low heat. Stir the butter frequently until melted to prevent it from burning.

On medium heat, add your marshmallows. I recommend using miniature marshmallows because they will melt faster than full-sized, but you can use what you have on hand.

Constantly stir the marshmallows and make sure that there are very few blobs of unmelted marshmallow in the pot.

Once your marshmallows have melted, add your rice cereal in. I recommend adding 3 cups of cereal first and folding them into the marshmallows until some of them have stuck together. Then add the rest of the cereal and mix until the marshmallows and cereal are fully incorporated.

Transfer your cereal treats to your prepared baking pan.

Spray some cooking spray or rub some non-dairy butter on your hands. This will prevent the marshmallow from sticking to your hands in the next step.

Gently press the cereal treats into the pan, making them an even thickness and filling in all the sides of the pan.

Allow the treats to cool for 10 to 15 minutes before cutting them into pieces.

Serve and enjoy! To keep them fresh, put them in an airtight container. The cereal will become stale very quickly and your treats will lose their crunch.


No-Churn Peach Ice Cream

We can’t think of a better way to enjoy the flavors of summer than cooling off with homemade ice cream with fresh fruit. This recipe requires just a few simple ingredients and a hand mixer, so it’s a perfect set-it-and-forget-it recipe for the heat of August in Virginia. Because this ice cream doesn’t have any extra stabilizers in it, it freezes up quite solidly. You’ll want to leave it out for 5-10 minutes to thaw a bit before serving, after which it will be soft enough to scoop and enjoy a refreshing treat.

Ingredients:

8 ripe peaches
2 cups heavy cream
(1) 14 oz can sweetened condensed milk, chilled
2 tsp vanilla extract
⅛ tsp of salt

Instructions:

Put your sweetened condensed milk in the refrigerator to chill.

Wash and peel your peaches. Slice them into wedges. Roughly chop them and set them aside.

This is an optional step, but if you have a blender or food processor you can blend half of your chopped peaches. This will give your ice cream base a more powerful peach flavor than just using the chopped peaches. If you decide to blend half your peaches set them aside with your other peaches while you make the whipped cream.

In a large bowl, add your heavy cream, salt, and vanilla extract. Whip your heavy cream to stiff peaks, but be careful not to whip it too long and curdle it. You should stop right after the cream has doubled in size and has become stiff in the bowl.

Add your chilled sweetened condensed milk. Gently stir in a “figure 8” motion to keep from flattening the air out of your whipped cream.

Once the sweetened condensed milk is incorporated, add your chopped peaches and blended peaches if you chose to do that step.

Gently incorporate the peaches by stirring in a “figure 8” motion.

Transfer into a freezer-safe container that can hold up to 6 cups volume and cover with the container’s lid or plastic wrap. If you don’t have a container that will hold that volume, you can easily transfer it into 2 different containers. I recommend using 2 loaf pans and covering them with plastic wrap. You can always send the extra container off with someone else to share.

Put your ice cream in the freezer to set overnight or at least for 8 hours.

Allow the ice cream to thaw for about 5-10 minutes before serving and enjoy!

Summer Quick-Pickles

If your garden is overflowing with cucumbers, quick-pickling is a great way to preserve them. Using rice vinegar in place of white vinegar gives these pickles a unique flavor, along with classic pickling spices dill and garlic. These will last up to 2 weeks in the fridge, and are a delightfully crunchy and tangy topping on Asian dishes, salads and even in sandwiches.

Ingredients:

1 ½ cups rice vinegar
3 cloves garlic (3 T if using pre-minced)
8 small cucumbers (or 3 large, depending on what variety you’re growing in your garden)
1 generous bunch fresh dill

Instructions:

Mince your garlic. Set aside.

Wash your cucumbers and peel or cut off any bad spots on your cucumbers. You can choose to completely remove the peel from your cucumbers if you prefer, but it is not necessary.

Slice your cucumbers to about ¼ of an inch in thickness.

In a large dish with an airtight lid, put half of your sliced cucumbers. Lay about half of your minced garlic and dill on top of the layer of cucumbers. Repeat this with the other half.

Pour your rice vinegar on top and put the lid on your dish.
Refrigerate overnight or for at least 8 hours before serving. Enjoy!

Sweet & Spicy Summer Rolls (Vegan)

These vegan summer rolls are the perfect snack when you’re craving something fresh and flavorful. Packed with filling veggies and a balance of sweet and spicy, you’re bound to make these rolls all summer long. We hope you enjoy this recipe.

Ingredients:

1 firm ripe mango
1 large carrot
½ medium cucumber
1 medium yellow bell pepper
4 oz firm tofu
¼ cup basil leaves
¼ cup cilantro leaves
6 rice paper wrappers
¼ cup neutral oil (or more if needed)
3 T water
3 T cornstarch
1 T sambal oelek
1 T soy sauce
1 T maple syrup

For the dipping sauce:

1 T sambal oelek
1 T soy sauce
1 T maple syrup

Instructions:

Prepare your vegetables. Peel your carrot and cucumber. Cut the top and bottom off your bell pepper, remove the seeds and pith.

Cut your carrot, cucumber and bell pepper into matchstick-size strips and set aside.

Cut your mango in half and separate the pit from the fruit. Remove the fruit from the peel. Cut the mango fruit into thin wedges and set aside.
Roughly chop your basil and cilantro. Set aside.

Drain your tofu and cut off 4 ounces from your block of tofu. This is about ⅕ of a block, for reference.

Cut your tofu into 1-inch strips. Set aside.

In a large skillet, add your oil and set to medium-high heat. You can test if the oil is hot enough to fry the tofu by flicking a little water into the pan. If it sizzles and bubbles, you’re ready to start frying.

In a small bowl, add your water and cornstarch. Stir well until combined.

Dip each piece of tofu in the cornstarch mixture and let the excess drip off. Carefully place them in the skillet and fry until golden, flipping them over occasionally to make sure each piece fries evenly. You may have to do this in batches, depending on the size of your skillet.

As your tofu strips finish frying, transfer them to a small bowl.

Once all the tofu is done, add your sambal oelek, soy sauce and maple syrup to the tofu and toss gently to coat it evenly. Set aside.

Get all your ingredients close by to begin making your summer rolls. I recommend having a space to fold your rolls, like a cutting board, and a separate plate to set them on once they’re done.

Take a large dinner plate and fill it with warm water. Dip your rice paper into the warm water for about 5 seconds, until every part has touched the water.

Quickly lay the rice paper down on the cutting board and assemble your roll. Put your cilantro and basil on the rice paper, towards the bottom but not on the edge. Stack your carrots, cucumbers, peppers and tofu on top of the herbs.

Fold the bottom edge of the rice paper over your filling. Fold in the two sides, then roll towards the top edge of the rice paper until it is sealed. Make sure to move quickly, or the rice paper will become too sticky and difficult to fold. Set the roll on your plate and repeat until you are finished.

In a small dish, make your dipping sauce.

Add your sambal oelek, maple syrup and soy sauce. Stir to combine.

Serve your summer rolls with your dipping sauce and enjoy!


No-Bake Pineapple Tart (Vegan)

This chilled tropical dessert is sweet and tangy and perfect for summer. Best of all, this tart has a no-bake crust, so your kitchen can stay cool while you work. We hope you enjoy this recipe.

Ingredients:

1 5.4oz can of coconut cream
1 ½ cup pineapple (canned or fresh)
¼ cup sugar
2 T cornstarch
1 tsp vanilla extract

For the crust:

1 ½ cup almond flour
⅓ cup brown sugar
⅛ tsp salt
1 tsp vanilla extract
¼ cup vegan butter

Optional decoration:

Cut pineapple wedges


Instructions:

Add your almond flour, brown sugar and salt to a large mixing bowl. Stir to combine.

Melt your vegan butter. Add your vanilla extract and melted vegan butter to your dry ingredients, mixing until a loose dough forms.

Transfer your dough to an 8-inch pie dish or tart pan. Press the dough into the pan and up the sides until it’s firm and spread evenly around the pan. Set it in the fridge while you assemble the filling.

Blend your pineapple until it’s smooth. Set aside.

In a large pot over medium heat, add your can of coconut cream. Stir until the coconut cream is smooth and is at a low boil.
Add your blended pineapple, vanilla extract, sugar and cornstarch to the coconut cream. Stir constantly for 15 minutes, until most of the cornstarch has dissolved and the mixture is thick.

Pour your pineapple filling through a sieve or a fine strainer and into another bowl. This will remove the pineapple fibers or any undissolved cornstarch and make your tart filling smooth.

Gently pour your pineapple filling into your tart crust, spreading evenly.

Put the tart in the fridge to set, covered, for at least 8 hours before serving. Enjoy!

Lavender Simple Syrup

Making syrups in your favorite flavors might sound complicated, but with this recipe you’ll find it can be easy and simple. Lavender isn’t a flavor you’ll find on the menu of every coffee shop or cocktail bar, but it gives your favorite beverage a unique and delicious flavor. Try adding this simple syrup to your iced drinks and enjoy its earthy, floral flavor.

Ingredients

1 cup water
3 ½ T. lavender buds
2 cups sugar

Instructions

In a medium pot, bring your water to a rolling boil.

Add your lavender buds and sugar to the pot.

Reduce to low medium-low heat and stir in the sugar until it has dissolved.

Simmer the mixture for 15 minutes uncovered.

Remove the syrup from heat and allow it to steep for an hour, uncovered.
Using a fine strainer or sieve, separate the lavender buds from the syrup.

Put the syrup in a mason jar or container with a strong-sealing lid and refrigerate.

The lavender simple syrup will keep for 1-2 months if well sealed.


Serving Suggestions:

Add 1-2 T of syrup to your iced or hot coffee and stir to combine.

Drizzle it over waffles or pancakes.

Use it in sugar glazes for baked goods.

Add it to fresh lemonade.

Use as a one-to-one replacement for simple syrup in your favorite cocktails.