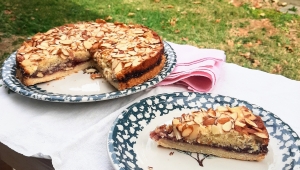
Liquid Sunshine Mead Cocktail

Mead is easily one of my favorite drinks year-round, but I’ve dressed it up a bit to make this refreshing summer cocktail. Sweet and bright, Liquid Sunshine” earns its name and an invitation to every backyard party or porch-sipping while the warm evenings last. Relax and enjoy the summer sunset with a sip of sunshine in your hand. 


Ingredients:

3-4 oz of plain mead (I used Thistle & Stag’s Golden Stag, but you could you any of the meads we carry)

1-2 T fresh lemon juice

4 oz sparkling water or tonic water

Peach slices


Instructions:

Slice your peach and add as many slices as you’d like into a cocktail glass with ice.


Add your lemon juice, mead and sparkling water or tonic water. Stir to incorporate.


Garnish with a peach slice if you’d like, and enjoy your delicious beverage.

Lemon Posset

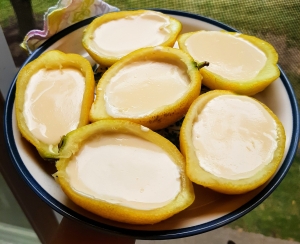
Nobody enjoys a hot kitchen during the peak of summer heat, but this recipe won’t have you making any sacrifices for a scrumptious treat. Similar to a pudding or custard, possets require little heat and some time in the refrigerator to become a creamy, tangy, refreshing dessert. Better yet, depending on the fruit you use, you can pour your posset into its own compostable container. 
 

Ingredients:

3 lemons (medium or large)

¾ cup heavy cream

1.3 cup granulated sugar

2 T lemon juice 

½ T lemon zest (or 1 T if you want stronger lemon flavor)

1 tsp vanilla extract


Instructions:

First, prepare your lemons. Cut them in half lengthwise and scoop out the flesh inside. Don’t throw them away, however, as you’ll use them later. 

Juice one of the lemons and set the juice aside.

Zest one of the lemons and set that aside also. 

In a saucepan, add your lemon zest, heavy cream and sugar. Bring it to a low summer for 3-4 minutes. Don’t allow it to boil.

Remove it from heat and add your lemon juice and vanilla extract. Stir well to combine

Run the posset through a fine mesh sieve to remove the lemon zest. 

Pour the posset into your hollowed-out lemons and allow it to set in the refrigerator for at least 4 hours, or overnight if possible. 

Garnish with cut fruit or extra lemon zest and enjoy!

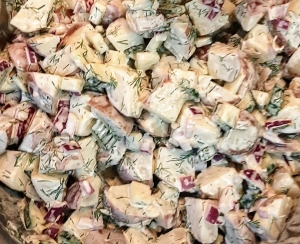
Tzatziki Potato Salad

This Greek-inspired potato salad has captured our taste buds this summer and we’re so excited to share it with you. This dish is perfect for any picnic, cookout, or lawn party and will help you beat the heat without being the least bit bland. Creamy and tangy, it has everything you want in a potato salad and much, much more. 
 

Ingredients:

2 lbs. red potatoes

1 large European cucumber

¼ cup fresh dill

1 red onion

2 cloves garlic

⅔ cups whole Greek yogurt

3 T mayonnaise 

2 T lemon juice (about 1 medium lemon)

Zest of ½ a lemon 

2 T salt, divided

½ tsp black pepper


Instructions:

Wash your red potatoes and remove any eyes or blemishes. Cut your potatoes in half, into chunks of your preferred size. 


Bring a large pot to a boil and add a tablespoon of salt to the water.


Once the water is boiling, add your potatoes. Set a timer for 14 minutes, stirring occasionally to keep any potatoes from sticking to the bottom. 


While the potatoes are boiling, you can work on vegetables. 


Have your largest mixing bowl on hand to dump your prepared vegetables into as you go. 

I prefer to peel my cucumbers, but you can leave the skin on. Chop the cucumber into small pieces and add to your bowl. 


Chop your red onion and mince your garlic if you’re not using pre-minced. Toss them into your bowl. 


Remove your dill from the stem and roughly chop it into smaller bits. Add it to your bowl. I find that most bunches of dill have far more than ¼ of a cup’s worth, so I like to chop the remaining dill and freeze it to avoid wasting it. 


Now cut your lemon in half and squeeze it into the bowl with your other vegetables. Zest one half into the bowl, in addition to your black pepper and salt. 


Finally, add in your Greek yogurt and mayonnaise. Stir everything until it’s well incorporated. 


By now, your potatoes are sure to be done boiling. They should be fork-tender but still holding their shape. Drain them and remove as much excess water as you can. 


Add your potatoes into your mixing bowl and stir until the potatoes are coated and everything is well incorporated. 


Set your potato salad in the refrigerator for 2-3 hours to cool completely in a covered dish. Enjoy! 

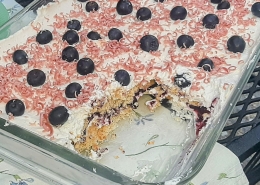
Lemon Blueberry Layer Cake

This wonderful layer cake is great for an early summer dessert, highlighting fresh-and-fruity flavors during blueberry season. Lemon and blueberry are a classic combination, but I added something a little different into the mix and used coconut sugar instead of cane sugar. For those sensitive to cane sugar or just wanting to try something new, this lovely cake is for you.


Coconut sugar is a darker sugar, so your cake and buttercream will come out a little darker in color than if you use cane sugar. Keep that in mind when you take a peek at your cake in the oven- it may look more done than it truly is. You are welcome to use cane sugar in this recipe, it will still turn out scrumptious. 


Ingredients for the cake:

2 ½ cups flour (sifted)

1 ½ tsp baking powder

½ tsp baking soda

¾ tsp salt

1 cup butter (room temperature)

1 ½ cups coconut sugar

2 T lemon zest

3 eggs

1 cup milk

¼ cup lemon juice (roughly 3 lemons)

1 T vanilla extract


Ingredients for the filling:

2 cups blueberries 

1 cup coconut sugar

1 T lemon juice


Ingredients for the buttercream:

4 cups powdered coconut sugar

1 cup butter (room temperature)

½ Tsp vanilla extract


For decorating:

1 cup blueberries (optional)


Instructions:

Before making your cakes, prepare the filling.


If you’re using fresh lemon juice, squeeze your lemons into a measuring cup and set aside. All 3 lemons should make a little over ¼ cups of juice, so you can use the extra in your filling. Hold onto at least 1 lemon before discarding it to use for zesting. 


In a large saucepan on medium heat, add your blueberries, sugar, and tablespoon of lemon juice. Stir constantly to keep the sugar from burning. After 3 to 4 minutes, or when your blueberries have begun to soften, smash them into a pulp with a potato masher or the back of a wooden spoon. Cook them down until it thickens. You’ll know it’s ready when the bottom of your pan doesn’t immediately flood with blueberries after you swipe a spoon across it. 


Transfer your blueberry filling into a jar or bowl and set it aside in the refrigerator to cool. 


Now you can begin making your cake. Preheat your oven to 350°F and prepare two 8-inch cake pans by buttering them and lining the bottom with parchment paper. Set them aside. 


If you’re not using cake flour, sift your flour. I find that transferring it between two mixing bowls using a sifter or fine mesh strainer works very well. 


In a large mixing bowl, add your sifted flour, baking powder, baking soda, and salt. Whisk together and set aside. 


Cut your butter into tablespoons and add it to another large mixing bowl. Whip with a hand mixer until fluffy. I find that cutting the butter makes it easier to cream and fluff. 


Zest your reserved lemon into the butter, in addition to your sugar. Whip with your hand mixer until incorporated. Add in your eggs one at a time and whip until the mixture is smooth. 


In a separate bowl, whisk together your milk and lemon juice.


Add ⅓ of your flour mixture into your butter mixture, then add ½ of your milk mixture. Mix with a hand mixer until just incorporated. Repeat until everything is combined. 


Divide the batter into your prepared 8-inch baking pans. 


Bake for 40 minutes and allow them to cool before assembling. 


While your cakes are baking, you can start the buttercream. 


Powdered coconut sugar can be difficult to find in the store, but you can make your own using a blender or food processor. Simply blend it until it becomes a fine powder and it will incorporate wonderfully into your buttercream. 


In a large mixing bowl, add your butter. Whip it with a hand mixer until fluffy.


Add your powdered coconut sugar into the butter one cup at a time, mixing until just combined each time. 


Once all your sugar has been added to the butter, add in your vanilla extract. Mix the mixture for another 3-5 minutes and set aside in the refrigerator to use later. 


When your cakes have cooled completely, you can begin assembling and decorating your cake. Get your blueberry jam, buttercream, cakes, and fresh blueberries ready for assembly. 


You can level your cakes if you choose, but I often save extra buttercream for the top of the cake and use it to create an even surface. 


You will need a piping bag to apply your buttercream, or a careful hand and a spatula if you prefer not to use one.


On your first layer, pipe a thick ring of buttercream around the interior edges of your cake. Fill the center with ½ of your jam and spread it in an even layer. Put your second cake on top. 


Pipe a generous layer of buttercream on the sides of your cake and smooth them out with a spatula, then add a generous layer of buttercream on the top. Go over it a second time to cover all the spots and smooth it out, as well as making the top an even surface. 


Decorate the cake to your desire. I enjoy piping a ring around the outside edge and adding the remaining blueberry jam into the center to help keep it from slipping down the sides. Piling a layer of fresh blueberries on top works wonderfully as well. 


Put it in the refrigerator to set for an hour or so, or serve immediately. 

Hot Mamba Burger

Do you like peanut butter on your burger? How about with a little kick? Big Spoon Roasters delivers even bigger flavor with their handcrafted nut butters, and their spicy-and-subtly-sweet Hot Mamba Peanut Butter had us scheming. Pick up a jar the next time you’ve got burgers on the menu and it’ll be sure to spice things up in your condiment rotation. Find it in Aisle 2, next to its other delicious neighbors.


Ingredients:

1 lb. ground beef (or pre-formed burgers)

Salt

Pepper

Steak seasoning (optional)

1 package hamburger buns (brioche works best)

Lettuce

Tomato (sliced)

Mayonnaise

Sharp cheddar cheese (or American)

Hot Mamba Peanut Butter


Instructions:

We made our burgers on a stovetop in a cast-iron skillet and our instructions will reflect that. If you have access to a grill, feel free to use that to cook your burger. 

Put your cast-iron skillet on medium-high heat to get it ready for your burgers. 

While your skillet is getting hot, season and portion out your burger meat. Add a generous amount of salt and pepper to your preference, along with any other seasonings you desire. 

We made ¼ lb burgers and weighed them out using a kitchen scale, but you can do it by eye as well. Form your burgers and using your thumb, put a little dent in the center. This will help them cook evenly.

On medium heat, add your burgers to your cast iron skillet, as many as you can fit without crowding the pan. 

Once most of the juices in the burger rise to the top, they’re ready to flip. Cook them as-needed for your desired done-ness. I recommend checking them with a meat thermometer to make sure they’re ready before pulling them off the skillet. Repeat this until all your burgers are cooked.

Right after you take them off the skillet, add a slice of your chosen cheese. You can put them in the pan with the heat off, covered, to help melt the cheese. 

Add a blob of Hot Mamba Peanut Butter to your liking. I recommend about a tablespoon or 2 spread on top of the cheese to get a balanced flavor. 

Assemble your burger with slices of tomato, lettuce, and mayonnaise as desired. I recommend lightly toasting your burger buns before adding mayonnaise. 

Serve and eat immediately. Enjoy!


Onigiri

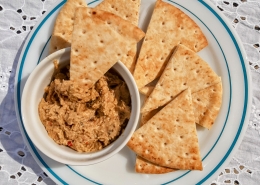
In honor of Asian-Pacific Heritage Month, we tried our hand at a popular Japanese snack. Onigiri, or rice balls, are made with different fillings wrapped in sushi rice and bundled with nori. This recipe is pretty hands-on and fun to make, plus it’s easy to customize with flavors you enjoy. 

Ingredients:

1 cup uncooked sushi rice

1 ½ cups water

1 sheet sushi nori

1 can of tuna

1 T mayonnaise 

¼ tsp soy sauce

Salt


Instructions:

Line a baking sheet with parchment paper. You can also prepare a long glass or ceramic serving dish and set it aside. 

Wash your rice in a large bowl until the water runs mostly clear. You may have to fill the bowl and drain it 3-4 times.

Fill the bowl with 1 ½ cups of water and let the rice soak for 30 minutes. Set aside. 

While your rice is soaking, make your filling and prepare the nori. We opted to fill our onigiri with a Japanese-style tuna mayo salad. There are several other fillings you can choose if tuna isn’t your speed, such as Japanese salted salmon, cod roe, or umeboshi (pickled plum). There are several online resources with recipes on how to make other onigiri fillings if you desire. 

Drain you can of tuna and put it in a small bowl. 

Using a fork, fluff out the tuna until there are no clumps.

Add your mayo and soy sauce, then mix them together with the fork until well combined. Set aside. 

Using sharp scissors, cut your nori into 6 strips and set them aside. 

 When your rice has finished soaking, drain the water out completely. 

Once your rice has drained, it’s time to cook it. You can use a rice cooker if you have one, or a large pot. 

If you’re using a pot, put your rice and 1 ½ cups of water into the pot and bring them to a boil, covered. 

Once it’s boiling, put it on low heat and keep the lid on. Cook for 12 minutes, then check on your rice. Check to see if there’s any water left in the pot. If there’s still water left, cook for another 2-3 minutes until all the water has been absorbed. 

Take the pot off the heat but keep the lid on and allow it to steam for 10 more minutes. After the rice has finished steaming, fluff it and transfer it over to your baking sheet or serving dish. Spread it out so it has more surface area to cool, stirring occasionally to allow it to cool down more. 

You want the rice to be cool enough to touch, but not completely cold so that you will still be able to mold it. Once it reaches a suitable temperature for you to touch, sprinkle it with salt and divide it into 6 equal portions. 

Now you can start assembling your onigiri. 

First, get all your components ready. Bring your tuna mayo, nori, salt, and a bowl of water next to your workspace. Divide the tuna mayo into 6 equal portions.

Lightly wet your hands with the water and put a little salt on them. This will stop the rice from sticking to your hands while you work. 

Take one portion of rice and put it into the palm of your open hand, spreading it up to your fingertips and near your thumb. 

Press it down and make a well in the very palm of your hand, then add a portion of tuna mayo and press it in. Close your hand, patting the rice around the tuna mayo to close it. Shape it into a ball the best you can without any tuna mayo falling out, then pat it into a round triangle. 

Put a strip of nori on the bottom, as pictured, and set it aside. 

Repeat. 

Refrigerate the nori and pack them for lunches, snacks, or picnics. Lasts up to 3 days in the refrigerator before losing their freshness. Enjoy!

Chocolate Covered Strawberries

May is the beginning of local strawberry season in the valley, and we receive carton upon carton of local strawberries. This dessert recipe perfectly highlights the sweet and tart flavor of fresh strawberries, with the delightful contrast of rich chocolate. It may seem simple, but we have some tips and tricks to make this classic recipe even easier. 


Ingredients:

1 pint of strawberries

1 cup of dark chocolate chips 

1 T coconut oil 

Sprinkles for decoration (optional)


Instructions:

Prepare a large baking tray with parchment paper. Set within reach of your stove. 

Wash and dry your strawberries. Don’t cut off the stems, as you’ll want to use them to hold onto your strawberries when dipping them in chocolate. 

Melt your chocolate using the double boiler method. To create a double boiler at home, you’ll need a pot and a heat-safe bowl that fits on top of the pot without falling inside of it. Take the large pot and fill it up halfway with water. Bring it to a boil and place the heat-safe bowl over the pot and add your chocolate and 1 tablespoon of coconut oil to the bowl. Bring the heat down to medium-high and make sure to stir the chocolate often to prevent it from burning at the bottom of the bowl. The chocolate will melt and once melted, you can reduce the heat to low and stir occasionally to keep it from solidifying again

We added 1 tablespoon of coconut oil to keep the chocolate from solidifying, as it takes a little while to dip all your strawberries into the chocolate. The coconut oil also gives the chocolate a glossy sheen once it’s cooled and set, in addition to keeping the chocolate from falling off all at once when you bite into the strawberry. 

Once your chocolate is ready, dip each strawberry and roll it in the chocolate until it’s completely covered. You can hold it by its stem and leaves if they’re still on the strawberry, but if not, you can hold it by sticking a fork or a toothpick into the top. 

As you go, set each finished strawberry onto the baking sheet. Add sprinkles to them if you desire. Repeat until you’ve dipped each one

Set your strawberries in the fridge and allow them to cool for at least 3 hours. 

Transfer them to a plate or a container with a lid. They will last up to a day in the refrigerator before they start leaking strawberry juice, although they’re so good they may all get eaten in the first hour!

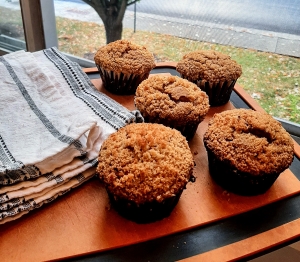
Sunday Morning Coffee Cake Recipe

Sunday brunch doesn’t seem complete without something sweet! If you’re entertaining or want some all to yourself, this coffee cake is the perfect addition to any morning that calls for a treat. The cinnamon-brown sugar swirl inside this fluffy cake is warm and comforting, along with a crumbly streusel topping. It pairs wonderfully with a cup of coffee or tea and makes enough that you’ll have plenty left to enjoy later. 


Ingredients:

For the cake:

3 ¾ cup all-purpose flour

12 T butter, room temperature

1 ½ cups sugar

⅓ cup brown sugar

2 ½ tsp baking powder

2 T vanilla

1 tsp salt (if using unsalted butter)

3 eggs, room temperature

½ cup plain greek yogurt

1 ¼ cups milk (room temperature)

For the topping:

⅔ cup all-purpose flour

⅔ cup sugar

4 T butter, melted

2 tsp ground cinnamon

For the filling:

1 cup brown sugar

1 ½ tsp cinnamon

Instructions:

Preheat your oven to 350°F. 


Prepare a 9 x 13-inch pan by greasing it with butter or cooking spray. Set aside. (Note that you do not want to use a pan smaller than 9 x 13 inches. This recipe makes a lot of batter, and you’ll need a large pan to hold it all. If you’d like a thinner coffee cake, you can use a larger pan, but a smaller pan will be sure to make a mess in your oven. If you don’t have a pan large enough, you can use 2 loaf pans or 2 10-inch cake pans.)

First, prepare your topping and filling so they’ll be ready when you make the coffee cake batter.

To make the topping. Melt your butter in a saucepan or using the microwave and a microwave-safe bowl. Whisk together your melted butter, sugar, flour, and cinnamon until combined. Set aside. 

For your filling, whisk your brown sugar and cinnamon together until combined. Set aside. 

Now that your toppings and filling are made, you can move on to the cake.

In a large mixing bowl, add your room temperature butter. Using a hand mixer, beat the butter until it’s smooth and spreadable, about 5 minutes or more. 

Add your flour, sugar, baking powder, salt, and vanilla extract to the butter. Mix by alternating between using the hand mixer and a mixing spoon until well combined. It will be similar to wet sand when it’s ready. This may take up to 10 minutes depending on how warm your butter is.

In a separate small bowl, add your room temperature milk and yogurt. Whisk together until well incorporated.

Pour the milk mixture into your flour mixture and beat with the hand mixer until just combined. 

Add your eggs into the batter and mix until you don’t notice any strong yellow hue in the batter from the yolks or clumps of egg white. 

Pour a little under ½ of your batter to your prepared pan, making sure it’s in an even layer and spreads to the sides of the pan. Sprinkle your filling on top in an even layer. 

Spread the remaining batter on top of the filling, making sure to reach the sides of the pan. Add your topping and make sure it covers every part of the exposed batter. 

Bake for 60 – 75 minutes. I recommend setting a timer for 60 minutes and checking on the cake by inserting a fork in the center. If it comes out doughy, your cake will likely need an additional 15 – 20 minutes in the oven. A good rule of thumb for this cake is that the edges will be a dark golden brown and cracks in the top will be lightly golden by the time the cake is done. 

Once your coffee cake has finished baking, remove it from the oven and allow it to cool for an hour before cutting and serving. Enjoy!

Mom’s Pesto Chicken Pasta

Spring is nearly in full swing, but we’ll still have a few chilly days here and there. When I want something that tastes fresh and bright, but is still warm and hearty, I reach for my mom’s favorite pasta recipe. This pesto chicken pasta is deliciously herby, with a creamy and tangy bite from the crumbled feta cheese clinging to the penne pasta. It comes together in just 30 minutes and can easily be made vegetarian by omitting the chicken for more pasta lovers to enjoy.

Ingredients:

1 16 oz package penne pasta

1 lb. chicken breast (optional)

2 bell peppers (yellow, orange or red)

1 yellow onion

2 T olive oil

1 clove garlic, minced

4 T of your favorite pesto (I used Amore® brand)

Salt and pepper to taste

1 package of feta (6 to 8 oz)


Instructions:


Bring a large pot of water to boil and cook your pasta according to the instructions on the package. Make sure to set a timer so you don’t overcook the pasta while you work on other tasks. When your pasta is finished, strain it, add it back into your pot, and set it aside.

While your pasta is cooking, you can prepare some of your ingredients. 


Chop the ends off of your bell pepper and remove seeds and pith, then slice it into strips. Set aside.

Cut your onion into slices and set aside with your bell peppers.

Crumble your feta into a small bowl, if you’re using a block, and set it aside.

Next, cut your chicken into bite-sized strips or however you prefer. 


In a large skillet, add 1 tablespoon of olive oil and your cut chicken. Sprinkle the chicken with salt and pepper and stir occasionally to help it cook evenly.

Once the chicken is cooked about halfway, add your peppers and onions. Sauté for another 8 or so minutes until the bell peppers are tender and the onions are translucent.

Add your garlic to the pan and cook an additional 2-3 minutes until it becomes fragrant.

Transfer everything into the pot with the pasta and add your remaining olive oil, pesto, and crumbled feta. Stir everything until well combined.


Add salt and pepper to taste and serve right away. Enjoy!

Vegan Salted Pistachio & Chocolate Toffee

Get into the spirit of St. Patrick’s Day with this delightful recipe for toffee, made vegan! Toffee is usually made with butter and cream, but we opted for all vegan ingredients and put our own spin on this classic candy with pistachios and sea salt. Toasty caramelized sugar pairs wonderfully with a smooth chocolate coating and crunchy pistachios to make a perfectly balanced sweet treat.

Ingredients:
2 cups vegan butter
2 ½ cups white sugar
1 T maple syrup
1 cup canned coconut milk (full fat)
1 tsp salt (if using unsalted vegan butter)
For the topping:
1 ½ cup pistachios (or nut of your choice)
10 oz vegan dark or semi-sweet chocolate
1 T flaky finishing salt (or to taste)

Instructions:
Before you begin making your toffee, you’ll want to get all your ingredients prepared and have your tools ready. When it’s finished, the toffee will be extremely hot, and you’ll need to move quickly to keep the sugar from burning. With this prep, you’ll likely save yourself from getting burnt as well.

First, roughly chop your pistachios. In a large pan, toast the pistachios on medium heat for 5-7 minutes, stirring frequently to keep them from burning. Then transfer them into a large bowl and set aside.

Chop your vegan chocolate into small chunks if you’re using a baking bar. Transfer it into a microwave safe bowl and set aside.

If you prefer not to use a microwave, you can use a double boiler method and have your chocolate melting before you start the toffee. To create a double boiler at home, you’ll need a pot and a heat-safe bowl that fits on top of the pot without falling inside of it. Take the large pot and fill it up halfway with water. Bring it to a boil and place the heat-safe bowl over the pot and add your chocolate to the bowl. Bring the heat down to medium-high and make sure to stir the
chocolate often to prevent it from burning at the bottom of the bowl. The chocolate will melt and once melted, you can reduce the heat to low and stir occasionally to keep it from solidifying again

Prepare a 9×12 baking pan by lining it with parchment paper. Set it aside, but still close enough that you will not have to move very far once you’re ready to pour your toffee into the pan. Make sure you have it set on top of something such as a heat-proof mat, serving tile or a thick towel to keep the heat from potentially melting your countertops.

Have your whisk, oven mitts and a candy thermometer close by. In a pinch, you can use a meat thermometer or an instant-read thermometer, whatever you have on hand so long as it can read up to 300℉.

Now that you’re all set up, you can begin making your toffee.

In a large soup pot, add your vegan butter. Melt it on low heat until there is no solid butter left. Add your sugar, maple syrup and canned full-fat coconut milk. Whisk to combine.

Turn the heat up to medium-high and stir constantly until the sugar dissolves, making sure to scrape down the sides of the pot. The undissolved sugar will make a gritty, scraping sound as you take the whisk down the side of the pot. When you no longer hear that sound, you’re ready to move on to the next phase.

Put on your oven mitts or heat-proof gloves and turn the heat on high. Insert your candy thermometer and stir the mixture constantly as it boils. Keep going until it reaches 285℉. This may take up to 15-20 minutes and by the time it is ready, it will appear thick and foamy with large, loud bubbles.

As soon as the toffee reaches 285℉, turn off the heat and remove the candy thermometer.

Quickly pour the toffee into your prepared pan, scraping out the remnants with your whisk.

Sprinkle ½ of your pistachios on top of the molten toffee.

Pour your melted vegan chocolate overtop of the toffee and pistachios in an even layer.

Sprinkle the top with your remaining pistachios and finishing salt.

Allow the toffee to cool down for about 10-15 minutes, then put it in the refrigerator to set for 4-5 hours.

Once set, remove it from the pan and break it into pieces.

Keep it sealed and refrigerated and enjoy your toffee for up to 2 weeks.