Fermented Garlic Honey
 In honor of honey month (and the impending flu season), we thought we’d share an easy immune booster: fermented garlic honey. Raw honey and raw garlic are both renowned for their health benefits, so they make a perfect pair, while fermentation naturally creates probiotics that benefit digestion and immune system health.
With only two ingredients and little preparation, this is a great way for beginners to get into fermentation. Let’s get started.
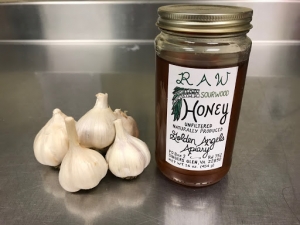
- You’ll need some raw (local) honey and garlic. Raw honey is unpasteurized, which means the beneficial bacteria and yeast responsible for fermentation haven’t been killed from processing. Local honey is ideal because it may help your system build immunity to local pollens (check Aisle 4 for plenty of options). For the garlic, 2-4 large heads should be plenty for a small batch. Here we used several smaller heads with a 16oz honey. Buy organic garlic, since pesticides can interfere with the fermentation process.
- Prepare the garlic by lightly bruising each clove by pressing down on top of it with the flat side of a knife. Try to keep each clove intact, so don’t push too hard — you just want to bruise it enough to easily remove the skin. Bruising garlic also kicks off a natural defense process that converts the enzyme alliinase into allicin, an antioxidant and anti-inflammatory agent.
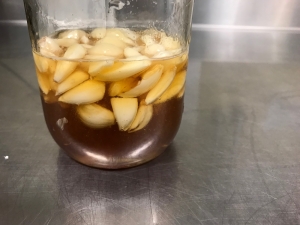
- Fill a clean mason jar ½ to ¾ full with the garlic and pour in enough honey to cover it completely. The size of the jar doesn’t matter much; just make sure you leave an inch or two of free space at the top. The cloves will float at first. Seal the jar, label it with the date, and store at room temperature in a dark place.
- Once a day, flip the jar upside down and swirl it to make sure none of the cloves are above the honey for too long. This will prevent unwanted mold growth on the surface of the honey. Once the garlic stays submerged on its own, you can skip this step. Loosen the lid of the jar to release the pressure that builds during fermentation (this is called “burping”), then re-tighten. Do this once or twice a day.
- Fermentation time varies by preference, but one month is a good starting point. By that point, the honey should be very thin and liquidy, and the garlic flavor will be strong. Have a taste and see what you think. Some folks let theirs go for a year or more. The garlicky flavor of the honey will intensify over time, while the cloves will lose some intensity and taste sweeter. You can continue to store it at room temperature to let fermentation continue.
 Eat a spoonful when you start feeling funky or in preparation for flu season. You can also eat the cloves whole. Try using the honey as a glaze for meat or pizza crust. Mix it into sauces and marinades for a sweet, garlicky kick, or with other natural remedies to create a natural health tonic. Make all your friends try it. Have a good time. Be well. (And check back soon for more recipes.)
Note that the Center for Disease Control advises against feeding raw honey to children under 12 months old to limit the risk of infant botulism (older children and adults can eat raw honey as they please).